BILT Speaker

BILT Speaker
RevitCat - Revit Consultant
Showing posts with label hide. Show all posts

Monday, 19 August 2019

PS - Update on Hide Zeros in Revit Schedules

Following on from my previous post about Hide Zeros in Multi-Element per Row Schedule, here is a simplified version of the schedule formulas - as noted in a comment by Kovyljan.

. . . . . When using the percentage formula, we can cut out one calculation field by changing which field the percentage is taken from:
"Schedule Count" instead of "MyCount" - since both of them have a value of 1 (or 0/Blank) when the schedule is expanded.

  • The 'MyCount' formula can then be changed to take on the role that 'MyCountTotal' had in my previous version:
    if(Schedule Count / MyPerc = 0, Blank, Schedule Count / MyPerc)

  • Make sure that 'MyCount' is formatted to not calculate totals - otherwise you'll get totals of totals per room.
 

  • Hide the 'Schedule Count',  'Blank' and 'Count' columns (Count is only required for checking anyway)
  • Rename 'MyCount' to whatever you need.

For more detail on this technique, refer to Hide Zeros in Multi-Element per Row Schedule
and Using Count Parameter in Schedule Formulas

Friday, 9 August 2019

Hide Zero Values in Multiple Item Rows in Revit Schedules

Hide zero values in schedules (Previous post)


Following on from a previous post about how to Hide Zero Values in Revit Schedules, I have noticed that it does not work when you untick 'Itemise each Instance' (Multiple items per row) and you set the formatting to calculate totals - the zero returns.

Calculate Totals - Zeros shown
In the example above, you probably would want to show the zeros when calculating totals of different numbers - but there are situations where you legitimately do not want to show the zero.  Here follows an example, and yet another workaround to solve that problem.

Example of Workflow

A situation where you may not want to show the zeros might be when the field is a count of items.  As demonstrated in my previous "Count Dracula" post, it is not possible to include the system parameter 'Count' in a Schedule formula; nor is it possible to make a 'Count' value of zero - the workaround to that problem is to create your own 'MyCount' parameter, as described previously.

In this example,  items are to be listed in a schedule with consecutive room numbers - at this stage some of the rooms do not yet have any real items placed in them.  The schedule needs to show all the room numbers, even when not yet furnished.   In order for the rooms to appear in the schedule, a dummy item has to be placed in the room, but we do not want it to be formally counted.
This is where a 'MyCount' parameter is useful, as the dummy items can be forced to schedule with a count of zero.
  • First a 'Schedule Count' parameter has to be created for the nominated categories
  • Set the value to 1 for all items to be counted
  • Set the value to zero for those not to be counted
  • [NB. This could be a Y/N parameter, but that has complications - to be dealt with in another blog post]
  • If it does not yet exist, create a 'Blank' calculated value, with no formula
    (Refer to Hide Zeros)
  • Then create a 'MyCount'  calculated value (Number or Integer)
  • It can be given a formula of:
    if(Schedule Count' = 0, Blank, Schedule Count)

  • The schedule should list a 1 MyCount value for each item to schedule, and nothing for those Spare (dummy) items.

  • Group the schedule by Room Number (no footers)
 
  • Untick "Itemise every Instance"
  • Notice that the MyCount total values are not totalling up
  • Format 'MyCount' to calculate totals
  •  Untick "Itemise every Instance"
  • Aaaargh!   The zeros are back

Workaround

In order to get the number of items in each room to total, you have to add a couple more calculated values - this is where it starts getting crazy!
  • Add another Calculated Value 'MyPerc' or 'MyPercentage'
  • Make it a Percentage (not a formula)
  • Select the field 'MyCount' of which it is to show a percentage
  • Select the Grouping title - 'Room Number' (rather than Grand Total) - so it only calculates a percentage of that Room sub-total

  • Add another calculated value, with a formula:
    if(MyCount/MyPerc = 0, Blank, MyCount/MyPerc)

  • This will show the total count per Grouping (Room) in each row - which looks a bit crazy when each row is listed separately

  • Untick 'Itemise every instance' and it looks better - and without the zeros
  • Do not Calculate Totals for these two calculated values, otherwise it gives wrong totals

  • Hide the intermediate calculated values, and rename the 'MyCountTotal' as desired

Now, if you actually want to show Grand Totals for the Item Count, that is another story . . . .
  • You would probably need to create another schedule that shows 'MyCount' (which gives the correct total), but collapse it down to one row (no sorting/grouping; no grant total) - and align it on a sheet with the column for MyCountTotal.
  • That would also enable you to have bold text for the total
  • However, I am not going to try that here - you are on your own.
[Edit.  A comment from Kovyljan has pointed out that the last method above can be simplified by making the percentage calculate on 'Schedule Count' instead of MyCount - refer to ps Update on Hide Zeros ]

For more information on this technique, refer to an earlier post on using Totals in Formulas *
For more information on creating your own Count parameter

* Thanks to Martijn de Riet of BIMForce who initially posted on his blog a similar solution to another scheduling problem in Revit

Thursday, 1 August 2019

Hide Zero Values in Revit Schedules

Revit likes to show a '0' or '0.00' in a schedule when the value is either zero or blank (sometimes).  This is not always desirable - in some situations you may actually want the schedule to show nothing when the value is zero.

There is a way to do this, although it is not in the units or display settings . . . . .

Blank Value Workaround

Let's suppose you have a 'Numeric value' field that is displaying zero values
  • The first thing to do in your schedule is to create a new Calculated field called 'Blank' (for example) - make it a Number type (if that is what your desired type is)
  • Do not put anything in the formula

  • Create another Calculated Value field - in this example I've called it 'Hides Zeros', but it can be whatever you want the title to display in your schedule
  •  This time give it a formula something like:
    if(Numeric value > 0, Numeric value, Blank)
  • This will hide all zero and negative values


  • If you want to display negative values and only hide the zero values, change the > in the formula to =:
    if(Numeric value = 0, Blank, Numeric value)

  • The next step is to hide the intermediate calculation columns:
  • Go to the Formatting tab and make the 'Numeric value' and Blank' columns hidden


Multiple Elements Per Row

What happens when you have a schedule that displays multiple elements per row, when you have unticked the grouping setting 'Itemise every instance'?
The zeros may return!
In which case refer to this post on Zero values in multiple elements per row Schedules

Thursday, 10 November 2016

Separating Model and Detail Lines in Revit - part 2

A couple of years ago I posted a description of how to distinguish between model and detail lines in Revit.  An anonymous comment rightly pointed out a method that I had missed - probably because it was right in front of me I completely forgot about an extremely useful view property:

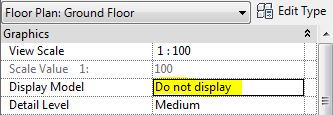
View "Display Model"

The default setting for this property is "Normal", which displays both 3D model elements and 2D annotation, so you don't necessarily know which is which.


One very common problem I find with dodgy Revit models is that people have 'drawn' floor penetrations using model lines rather than using shaft openings, or even worse, have used detail lines, which would only show in that view.

If you select across the whole model and filter out everything except lines, you can at least tell which ones are lines - but not which are model vs detail lines.  This is where the 'Display Model' property comes in handy:

Set it to 'Do Not Display' and all the model elements are hidden

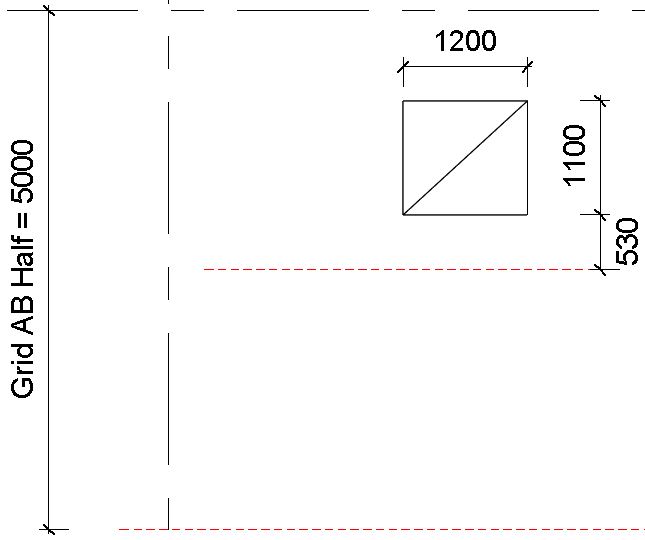
Interestingly, it keeps displaying grids & reference planes, which are neither model elements nor annotation - despite being lumped in with annotation on the Visibility Graphics dialog box.  They are in fact  what I call 'datum' categories.

One problem with this setting is that all the hosted annotation disappears too, so it is not easy to see things in context, nor can you be sure which hosted annotation is now hidden too.  This does have an added benefit of being able to check for 'dummy tags' (generic annotation symbols) and text that has been placed to look like real tags - all the real tags are hidden, and what is left visible is fake (or garbage as far as BIM is concerned).

There is a third option, which is extremely useful:  'Halftone'

This displays the model elements in halftone, and all the annotation as normal.  Now you can clearly see which lines are detail lines - they could be selected and converted to model lines, or better still, replaced by shaft openings.


As a 'Model Manager' you should be using this technique all the time to make sure that users are doing the right thing.  However, it is important to remember to set the Display setting back to normal when finished - better still, set it to normal in the view template and use the 'Enable Temporary View Properties' setting to do a temporary over-ride, which will reset itself when you finish.

Friday, 23 October 2015

Weird Stair Stuff - part 6 - Showing Concrete Stairs Under Tread Finishes

I was recently asked if it was possible to show a concrete setout plans (and sections) for a monolithic Revit stair that has a tiled finish or timber treads on top of the concrete - ie. to hide the finish and show the concrete riser lines only (which are in a different plan location to the finishes risers shown on the architectural plan).  You would think it should be an easy task given that most structural engineers would want to see only the concrete part of a stair.  Wrong!

By default, in an architectural plan view, Revit displays the finished nosing lines and the hidden riser lines (which may be coincident in plan if you do not have a projecting nosing).  One of the reasons for this is that Revit is not displaying the 3D model in plan views - it displays a hybrid 2.5D version that represents the stair in plan according to Revit's mysterious rules and system controlled subcategories (which are quite frankly, very limiting).
Normal architectural plan view of stair
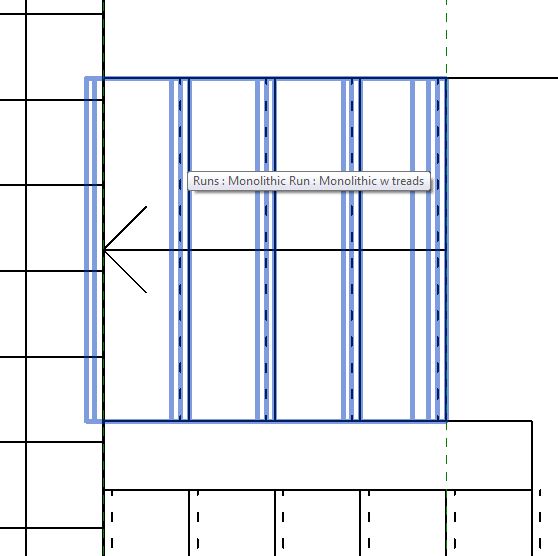
Changing the Discipline of the view to structural, makes no difference to stairs.  Hiding various stair subcategories will not show the hidden concrete underneath, whatever you try.  If you hover the mouse over the run (and tab to get just a run), it highlights the actual 3D model with all the hidden lines available - but they disappear as soon as you select it - how tantalising!
Pre-select run shows hidden lines of concrete below

If you hide the floor finish at the top of the stair (in this example it is modelled as a separate floor) you can see that there appears to be a gap - this is because Revit stops drawing the plan where it expects the top nosing line to be rather than where the top riser is (even though it does not model the nosing if your stair 'Ends with Riser').
Gap at top of stairs when floor finish is hidden

Back in the section view, if you turn off the 'Treads/Risers' subcategory it leaves just the concrete substructure.

Notice that the concrete actually extends to the back of the riser in section (and 3D) but this is not shown in plan.  The section also has a couple of other issues:
  • The concrete at the top of the stair stops in line with the back of the top riser, where in fact it should extend up until it meets the underside of the floor slab.  Obviously the stair has no knowledge of where that slab is or how thick it is, but there should be a way to deal with this.  There is a Run property for 'Extend Below Slab' so why not have one at the top.
  • There appears to be a joint between the landing and the upper run even though they are the same material - in fact it is a step in the landing because the concrete landing edge aligns with the nosing rather than the concrete riser.  This would need to be manually adjusted if you want them to align or if you want a finish applied to the landing edge.
Concrete Section - treads/Risers hidden
This is getting close to what a structural engineer might want to see, or for an architectural concrete setout drawing.  So how do we get this to display the same information in plan, when Revit really does not want to do so?

As a workaround, we could try using one of Revit's really weird features, as described in my post about stair arrows and detail views:

Detail view callout

Create a detail view callout of the stair.

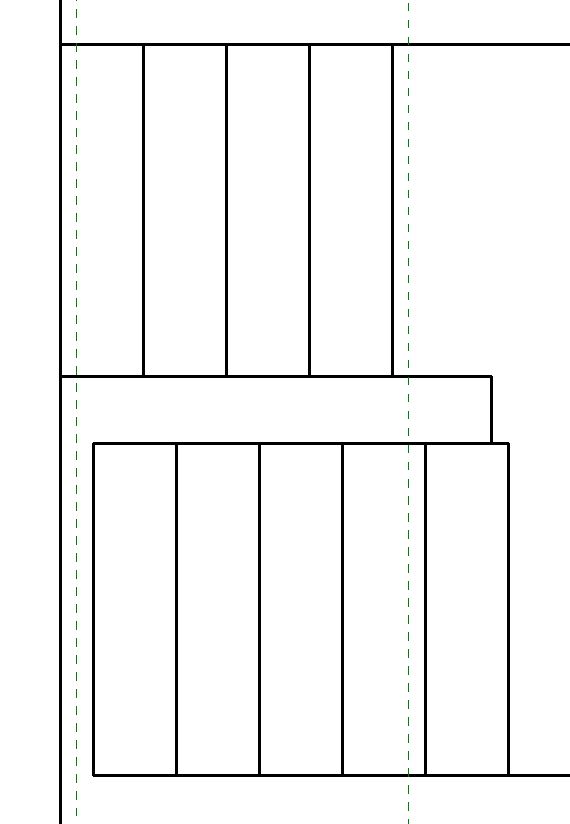
This type of view (Detail plan view) is actually a true 3D view (a horizontal section), which does not use the normal Revit 2.5D representation of stairs (and ramps).  The stair shows the top riser line (including thickness) and the actual nosing locations where modelled.  In the snapshot below the floor finish is hidden so you can see the top riser.
Stair in Detail plan view type

So now it follows the subcategory rules that normally apply to a section:
  • Nosing Lines, Riser Lines and Outlines are not relevant to this view type
  • Treads/Risers subcategory does apply - try changing the colour override to test it
Treads and risers overridden in detail plan view

Now try turning off the visibility of the Treads/Risers subcategory - and magically you can see the concrete underneath, because that is controlled by the overall 'Stair' category.

Of course there are some downsides to this method of creating concrete setout plans - Detail plan views are not normal Revit views:
  • You cannot place stair path arrows on detail views (although you can place stair numbers)
  • You cannot 'Reference Other View' callouts to regular plan views - so you would have to work out your view referencing carefully.
  • Detail views do not have a 'View Range', so you have to rely on the parent view or 'Far Clipping'
  • View cut plane is controlled by parent view - and cannot be overridden
  • You cannot use Plan Regions
  • If someone deletes your parent plan view, Vamoose detail view.
  • the list goes on . . . . .


Refer to  True 3D RCP View of a Stair in Revit for more uses of this technique
Refer to stair arrows and detail views for more detail on the downsides of this technique
Go to Revit Stair & Railings Index Page