BILT Speaker

BILT Speaker
RevitCat - Revit Consultant
Showing posts with label 2D. Show all posts

Tuesday, 3 January 2017

Separating Model and Detail Lines in Revit - part 3

Previously I posted descriptions of how to distinguish between model and detail lines in Revit and part 2 - using View Display Model .   These various methods demonstrate how to visually distinguish between model and detail lines - but not how to just select one or the other.  As previously described, you cannot use the Revit selection filter to separate the lines - it does not distinguish between model and detail lines, although it does separate by family type.

Revit selection filter

Add-Ins for separating model/detail lines

The solution to this is to use a Revit Add-In product.  My favourite is 'Ideate Explorer', which is robust and fairly comprehensive:
'Explorer' is a tool for model-management and auditing Revit projects - but is also very useful for finding objects, be they hidden or just not easy to identify using standard Revit tools.  One of the things it does is clearly separate model and detail lines in a selection, active view or even the whole project.
Filter by current selection

Select by Active View or Entire Project

Once you have narrowed down the filter to just the detail lines (if that is what you want), they are now selected so that you can now deal with them.  In the example below, detail lines have been used to indicate a floor penetration, which is a serious Revit misdemeanour!  They need to be replaced by a 'Shaft Opening' object.  However, that would mean recreating the dimensions - so if your drawing needs to be issued in the next 5 minutes, the least you could do is convert the lines to model lines using the 'Convert Lines' tool.


QuickSelect

Ideate Explorer is somewhat overkill for such a simple task, so from this year you can now use a sort of cut-down version called 'Ideate QuickSelect' - this just allows you to select or filter specific items in a similar fashion (by current selection, active view or whole project), without having any capability to further analyse the elements.
Ideate QuickSelect

These tools are great for finding other things that should not be in your model such as images or imported DWG files that have been placed and hidden on views - Explorer tells you which views they are on.  In that situation, when a view containing hidden items is duplicated with detailing, the hidden items are duplicated too, and remain hidden, which can rapidly lead to project file-size bloat.  One improvement to 'Explorer' would be to display the file size of imported DWGs and images.

Thursday, 10 November 2016

Separating Model and Detail Lines in Revit - part 2

A couple of years ago I posted a description of how to distinguish between model and detail lines in Revit.  An anonymous comment rightly pointed out a method that I had missed - probably because it was right in front of me I completely forgot about an extremely useful view property:

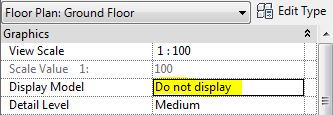
View "Display Model"

The default setting for this property is "Normal", which displays both 3D model elements and 2D annotation, so you don't necessarily know which is which.


One very common problem I find with dodgy Revit models is that people have 'drawn' floor penetrations using model lines rather than using shaft openings, or even worse, have used detail lines, which would only show in that view.

If you select across the whole model and filter out everything except lines, you can at least tell which ones are lines - but not which are model vs detail lines.  This is where the 'Display Model' property comes in handy:

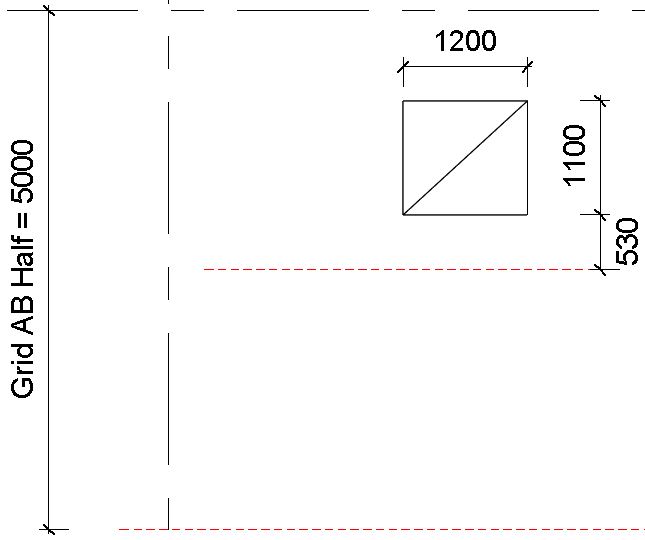
Set it to 'Do Not Display' and all the model elements are hidden

Interestingly, it keeps displaying grids & reference planes, which are neither model elements nor annotation - despite being lumped in with annotation on the Visibility Graphics dialog box.  They are in fact  what I call 'datum' categories.

One problem with this setting is that all the hosted annotation disappears too, so it is not easy to see things in context, nor can you be sure which hosted annotation is now hidden too.  This does have an added benefit of being able to check for 'dummy tags' (generic annotation symbols) and text that has been placed to look like real tags - all the real tags are hidden, and what is left visible is fake (or garbage as far as BIM is concerned).

There is a third option, which is extremely useful:  'Halftone'

This displays the model elements in halftone, and all the annotation as normal.  Now you can clearly see which lines are detail lines - they could be selected and converted to model lines, or better still, replaced by shaft openings.


As a 'Model Manager' you should be using this technique all the time to make sure that users are doing the right thing.  However, it is important to remember to set the Display setting back to normal when finished - better still, set it to normal in the view template and use the 'Enable Temporary View Properties' setting to do a temporary over-ride, which will reset itself when you finish.