
Following on from an earlier post about joining stairs and floors, I just wanted to clarify what happens when you try to join Stairs and Walls in section . . . .
We saw previously that Revit does have some limited capability to join stairs and floors at the base of a stair - but it has many limitations.
Joining a Wall and a Floor

All good Revit users would know that if a floor and a wall are of the same material, and they have coincident or overlapping edges, they can be "joined" in the model. This is not just a graphic tool that is done per view - it affects the model in potentially all views, including material quantity schedules. If an overlapping wall and floor are joined, the volume of material that was previously counted twice is corrected after the join so it is counted once.
 |
| Join Geometry |
 |
| Select floor and wall to join |

Joining a Wall and a Stair Landing

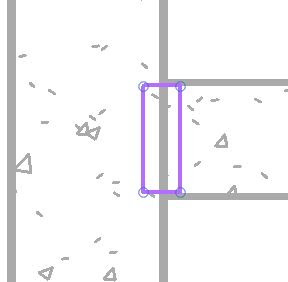
Try the same thing with a wall and a stair landing . . .

What happens? Absolutely nothing. After selecting the wall, Revit will not even highlight the stair landing (or vice versa if you select the landing first).
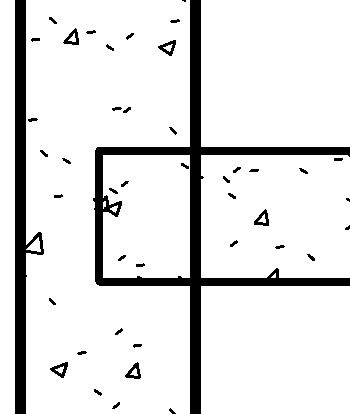
Well, that is just plain ridiculous! You might argue that the wall and landing would be cast separately on site, so there should always be a joint line between them - but the graphic convention is to not show a line, or at least show a thinner line between them in section.
What to Do?
There is no good workaround to this problem - each method is clunky and not robust.
Linework Tool
 |
| Linework Tool |

If you try the linework took, you immediately discover that it will not do the job for you, as it affects the whole wall.


That isn't very helpful, as you only want a small segment of the wall edge line to be invisible (or thin line).
Another strange Revit quirk with the linework tool is that when you select a line in elevation (or projection in plan) it gives you blue dots at each end , which can be dragged so that only part of the line has its style overridden. That is a very useful capability - but infuriatingly, it does not work on cut lines.

Yet another quirk is that the underside of a run is treated as one line when cut (section), but in elevation, each step is a separate line segment. Why, or why?
Filled Region
| Filled Region |
- They are quick and easy to understand for most users
- Their edge lines can be of different styles, including "invisible" as part of the sketch - so they hide model lines underneath
- They will merge with underlying element hatching , providing the material hatch style matches the filled region hatching

- They are view-based, so any patching up on one view will not show on other views
- Line edges/junctions can be messy when viewd close-up

- If the model is changed, the filled region will not change with it (unless you constrain the sketch lines, which is not generally advisable - as your model very quickly becomes over-constrained and unworkable)

Cut Profile
| Cut Profile (View Menu) |

The end result is not very promising in this situation
- The added shape does not obscure the wall line in the way that a filled region does
- The sketch lines cannot have a line style (unlike Filled Regions)
The worst thing about this idea is that the Linework tool does not work at all on cut-profile shapes - thus making this tool almost useless!
Conclusion
Sadly there is no clever workaround. The conclusion is that it is not worth fighting Revit on this one - just accept the joint line between wall and landing. In many cases it is not an issue, but when the stair and wall are both cast in place concrete, it is very annoying.