BILT Speaker

BILT Speaker
RevitCat - Revit Consultant
Showing posts with label top rail. Show all posts

Tuesday, 15 March 2022

Stepped Stair Railing Top Rail Extension in Revit


Following on from an earlier post about stepped railings, here is a bit more information about what happens when you try to add Top Rail extensions.

Weird Railing Stuff - part 18

If the lowest boundary line on the railing path has a Slope property "By Host", the railing segment will be horizontal (assuming you have done a Height Correction on the other segments)

To add an extension to the base of the stair railing:

  • Tab-Select the Top Rail only


  • Edit its Type properties
  • Tick the checkbox for "Plus Tread Depth";  Apply or OK
  • Nothing happens
  • Revit thinks that this segment of the railing is not part of a sloping stair, even though we know it is
  • Edit the Extension Length property to 300mm
  • This time Revit adds the extension (horizontal), as expected (but still no extra tread depth, unlike the straight handrail on the other side of the stair, where it has both)


  •  Confusing huh?

Solution

To solve this, the Slope property of the railing segment must be changed:

  • Select the whole railing
  • Edit the path
  • Select the last segment of the path
  • Change its Slope property to "Sloping"

  • Finish the Path sketch
  • The Top Rail should now be sloping and have both the 300mm extension (horizontal) and the extra tread depth (sloping)

Both railings should now match


Tuesday, 8 February 2022

Stepped Handrail on Stepped Stairs in Revit

A couple of years back I posted on how to create a stair with stepped sides. 


I always intended to follow it up with what happens to the handrail, and how to solve it?  Well, it is never too late.


Just in case you are wondering how to create the stepped side to the stair run in sketch mode - here is a trick for creating a DIY array in Revit.


When you create a stepped boundary for a stair run, the handrail also becomes stepped, but it is pretty clunky.


Baluster Placement

The first thing to notice is the hideous baluster placement - it is placing one at each change of direction, and one (or more) in the middle of each segment.

To tidy it up:

  • we will probably have to create a new railing type (to avoid messing up the straight railing on the other side of the stair
  • then edit the railing type properties; and the baluster placement
  • Untick the checkbox for 'Use baluster per tread on stairs'


  •  Balusters will only be placed at ends of each segment

Alternatively you could try the opposite: keep the Baluster per tread, but remove the start and end balusters - but then you lose control of the baluster locations in the segments running parallel to treads (not centred).


Top Rail Properties

You may not like the clunky Art Deco look of the vertical "Gooseneck" handrail segments, so the first step is to tab-select just the top rail (not the whole handrail) - then look at its Type properties

  • Change the Transitions from 'Gooseneck' to 'Simple' (or None)
  • Revit will give a not very helpful "not continuous rail" warning:
  • Whichever you choose (Simple or None), you get 'None', as Revit has a headache and thinks it is all too difficult, so it simply can't be bothered to join the segments

Edit Railing Segments

The next thing to try is editing the whole railing path:

  • Select the handrail
  • Edit the path

  • Select the first path segment at the base of the stair
  • Check its properties, displayed on the Option Bar
  • Change the Slope from 'By Host' to 'Sloped'

  • Finish the Sketch
  • Nothing appears to happen to the railing slope!  We will solve that later.
  • Edit the path again
  • Select the next segment that should be sloping (3rd from end)
  • Change its Slope to 'Sloped'
 
This is getting tedious, so let us try a couple of shortcut:

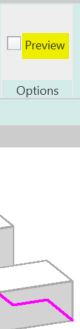
  • Instead of finishing the sketch to see how it looks, you could try the cool new Railing "Preview" feature in the ribbon menu (in a 3D view)


  • Tick the Preview checkbox
  • Aaaargh - it does not work when you adjust railing segment properties! It does not show the adjusted slope property.  You still have to Finish the sketch to see the effect


  •  Edit the path again
  • Select several segments to change their Slope property
  • Aaargh - the properties are not shown on the Option Bar when you select multiple segments!
  • Change the Slope properties for every alternate segment - one by one!
  • Finish the Path sketch

Something is wrong with the overall height of the railing when compared to the straight railing on the other side of the stair.  

  • This can be checked in an elevation view

Height Correction

To solve this, one way is to change the Height Correction property of each segment:
  • Edit the railing path again
  • Select the first segment
  • Change its Height Correction property to Custom; with a value to match the riser height
  • Finish the Path sketch
  • The railing height is now correct (more or less)
  • The lowest segment is now sloping

  • Check it in elevation


Now who has a headache?  Not just Revit!

This is a crazy amount of work to do in order to get this sort of correct.

Of course, you could avoid all this by just putting in a straight diagonal railing, but the point of this blog is to demonstrate the problems with stairs and railings - and to show workarounds (however nasty they may be).   There may also be situations where the diagonal railing is not appropriate - perhaps where the stepped sides are much larger steps.


Monday, 18 December 2017

Weird Railing Stuff - part 10 - Split railings

[Edit:  Revit 2019 has a new feature that allows you to split a railing - but all it does is to break the selected railing into two separate pieces that no longer relate to each other.  They can then be separately edited.   But just supposing you wanted to have a single railing element that has a gap in it?  Read on . . . .]
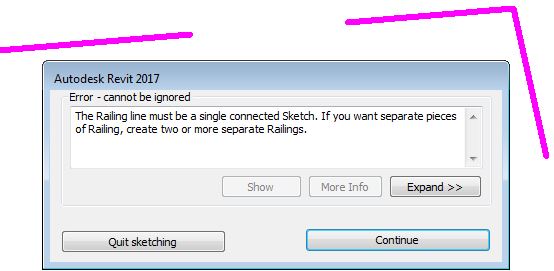
Have you ever tried to create a Revit railing with a split or break in it?  You'd have seen the warning that tells you it is not possible in Revit:

Split Revit Railings

Well, there is a way to do it - yes you can split railings (with lots of provisos, of course).
WARNING: this is another crazy workaround, so use it with caution . . .

In this example, a railing runs through a column, which is not desirable


You may want to break the railing and have a gap either side of the column

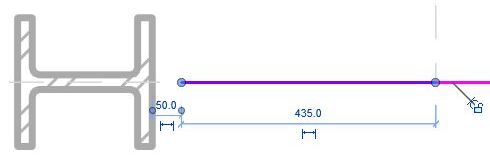
The first thing to do is edit the path of the railing, remove the top segments and stop it short of the column by say 50mm.


Once the top part of the railing is removed, Tab-select the 'Top Rail' (or Handrail) - it is important to select one of these sub-elements, not the overall railing.  NB. if your railing does not have either of these sub-elements, this technique won't work (eg. old style top rails)

Once selected, click on 'Edit Rail'

Then click on 'Edit Path' for the Top Rail

This will allow you to add lines to either the top or bottom end of the Top Rail element; but first it is important to set the workplane depending on whether you are adding to the beginning/bottom or end/top.

Select the name of the workplane.   I don't think that either of the 'Pick' options work here.

The workplane will be parallel to the first or last segment of the overall railing - so you'll need to work in either a 3D view or an elevation/section view.  It may be easier to start in 3D so that you can see exactly what you are doing and where.

This command is not explicit about what is going on - in fact Revit is waiting for you to draw some lines, which will become extensions to the Top Rail (or Handrail)

These lines do not need to be directly linked to the ends of the Top Rail - in fact they can be almost anywhere (in the same plane as the end of the Rail).  Start drawing a line the other side of the column from the end of the railing;  at this stage it may be easier to go into a section/elevation view to ensure that it aligns with the railing on the other side of the stair (but keep an eye on the active workplane).

Trace over the other railing (it should snap to it).

Once the Top Rail extension is complete, it will have a gap where the column is.


Be warned:  This is an extension to the Top Rail only - so balusters will not be attached to the underside of the extension.

Supports will not be attached to a Top Rail, so if you require supports on the extension, make sure before you start that your railing has a 'Handrail' sub-element, and add the extension to the Handrail, not to a Top Rail.  If you switch the railing to a type that does not have a Top Rail, the entire extension will disappear (if it was attached to a Top Rail in the first place).  Plan ahead!


Not surprisingly, this workaround is fiddly and not particularly robust - but I am showing it just in case it helps someone out.  In this example, it would probably have been much easier (and safer) to have two separate railings, but it might give people ideas about a use for this technique, so go for it.

Downsides:
  • Only works with a Top Rail or Handrail in the railing
  •  Top Rail and Handrail extensions are not interchangeable
  • Top Rail cannot host supports
  • Will not host balusters or posts beyond the split
  • Will not turn corners in plan
  • Will not automatically adjust heights/angles if the stair changes
  • Is quite confusing for anyone not familiar with railing extensions

Sunday, 24 September 2017

Weird Railing Stuff - part 7 - Support Spacing

It amazes me that very few Reviteers make use of the 'Railing Support' capability that we have had in the software for over 5 years now.  In fact, a very large percentage of users don't even know they exist
Here are some possible reasons why that is the case:
  • If you upgrade a project with the old style railings in it, they are not converted to the new style railings, so you cannot use railing supports in them.  To achieve this, you have to copy a new railing type into your project, then swap the old family type to a new one to get access to the support functionality.
  • The metric project templates provided by Autodesk do not include any railings that use handrail supports (this includes the Australian and UK templates);  they do have some support families - but if you don't know how to use them, you'll never figure it out by playing around with the railing samples.
  • The sample files that you can download from the Autodesk Knowledge website include only the old method of using balusters to look like handrail supports - and that is the imperial unit sample file, which you would expect to be the most likely one to be updated when the software was changed (The metric version would have no chance, even if you could find it on the Autodesk labyrinth-site).  I wonder if anyone at Autodesk knows what QA means?  'Quality Assurance' is the correct answer, not 'Quick As (get this out the door)'.
  • The settings for adding supports are buried deep as type properties of a nested family.  The chances of finding this are slim - although that has improved recently with the ability to get to a handrail family properties directly from the railing type properties dialog box with one mouse click.
  • The methodology for setting up handrail supports is mind-bogglingly complicated and counter-intuitive - and it is all type-based properties hidden inside handrail families nested into the railing family.
  • Even when you have set up the supports in a handrail family, you have to remember to choose left or right (for the handrail) in the railing family, otherwise nothing shows up.

Handrail Support Spacing

Once you have figured out how to set up Handrail Supports in a railing,you will obviously want to control the spacing - first the initial spacing, and then changing the spacing.  There are at least two weird things you need to know about this - the first is how illogical and inconsistent the spacing properties are.  The second weird thing relates to moving the supports - to be dealt with later:

Spacing Properties

Do you think it is weird that baluster spacing and handrail/top rail extension length properties are measured in plan distance regardless of the slope of the railings, while support spacing is measured along the actual length of the handrail whether it is horizontal, sloping, vertical or going round a twirly flourish at the end?  Whichever one is correct, it is weirdly inconsistent.

How would you measure the support distances on this handrail?
In the Handrail type properties, you have the typical Revit options (plus a special one):
  • None
  • Fixed Distance
  • Align With Posts
  • Fixed Number
  • Maximum Spacing
  • Minimum Spacing
Unfortunately these are not consistent with each other, and none of them will give you the outcome that you desire (unless by a fluke the spacing just happens to work for your stair):

1.  'Fixed Number' does not put supports at the ends of the railing;  the spacing varies depending on the overall railing length, and the number that you put in - NB. the number is a type property of the handrail, which means that you most likely need a unique handrail type and a unique railing type for every single instance of the railing.
It seems that the supports always use centre justification for this - it is greyed out and you can't change it;  also, the greyed out value for spacing is just a remembered value from the previous settings, and is misleading here.  Revit does not report back to you what the actual support spacing is on each handrail instance.

If you have a free end handrail, you would typically want a support close to the end (but not exactly at the end).  You don't get a support anywhere near the end, unless you put in a ridiculous number of supports, like 50 in this example.
Fixed number does not put supports at the ends
If you have an extension to wall or floor, then this option makes sense, however, the spacing includes the length of the extension, measured along the handrail, including vertical length for a floor extension.  The example below, with a wall extension is the one and only situation where Revit gets the support locations close to what you might need, albeit that you need a separate type for each different number of supports.


2.  'Fixed Distance' only puts a support at the start or end of the handrail if the justification is set to Beginning or End;  the distance at the other end is pot-luck depending on the overall handrail length.  If the justification is 'Center', then the distance from the start and end again depends totally on the overall length of the handrail - so it is luck of the draw, but it will be the same at each end.
The calculated distance includes extensions.


 3.  'Maximum Spacing' always puts a support exactly at the start and end of the handrail; justification is not an option here - it is greyed out (and set to center).  Just imagine sending this drawing to a builder or fabricator - you'd be laughed off the site.

Revit does not take into account whether an extension with a wall or floor fixing is chosen - it still puts a support in place at the very end, just where it is fixed to the wall/floor.

4.  'Minimum Spacing' behaves just like the Maximum Spacing settings, although the actual spacing will be different.

5.  'Align with Posts' is an interesting option - I don't get why you would use it, unless your posts are non-supporting in themselves.  If you do use it, you have no option for supports between the posts, so what good is that?  I would have thought the option should be 'Align with Posts & Maximum Spacing Between' and suchlike.  Or 'Maximum Spacing Except at Posts' etc.

With all of these options, you have the opportunity to unpin a support and move or delete it; [Edit - thanks to Peter Schiettecatte for pointing this out:] but you can only add additional supports by unpinning an existing one and copying it along the handrail (a clever but not too obvious workflow).  However, once you have done this, it takes just one innocent (or stupid) click on the 'Reset Railings' button to lose all that hard-won support over-ride spacing.

The Solution

What we really need to solve some of these issues is to have consistency in how the spacing is applied (at ends); and the ability to set start and end indent properties for handrail support spacing.  These would operate rather like the equivalent properties on a 'Divided Path', although I guess they'd need to be type properties to be consistent with all the other handrail properties (Oh, how I wish most of those were instance properties in the actual railing)

If you think this is a good idea, please go to the official Revit Ideas website and vote up my idea on this.

 More on this subject