BILT Speaker

BILT Speaker
RevitCat - Revit Consultant
Showing posts with label split. Show all posts

Tuesday, 3 September 2019

Reveal Obstacles in Path of Travel - Revit 2020.1

Revit 2020.1 Enhancement

If you place a 'Path of Travel' using the new (in Revit 2020) feature, you may encounter a situation like that shown below, where the path appears to go through an object that should be an obstruction - such as the path through sofa example below:


In addition to other Revit 2020.1 enhancements to the Path of Travel feature  - Move Start/End Points, we have a new tool that may help you out:

Reveal Obstacles in Path of Travel -


This is useful for figuring out why your path of travel is not behaving as expected. 
  • On the Analyze toolbar, click on 'Reveal Obstacles'

  • This temporarily changes the view display to show in orange all categories that represent obstacles to the path.
In the example below (Autodesk sample file), some items are not shown orange
 
  • The doors are not obstacles because that category is excluded
  • Some furniture is not shown in orange (obstacle) because they are below the cut plane for calculation.  The reason is that the model is split level, and the living area is 500mm lower than the rest of the house - refer to Analysis Zone follow up for more detail on Split Levels and calculation heights.
  • In the case of the large sofa family, one part of the component shows orange - this is the high back.  This demonstrates that Revit actually analyses the geometry of elements, not just a bounding box for each component - which is a good thing.

As the sofa is much lower than the main floor level, only the back projects up into the analysis zone.
  • If the sofa is raised by 200mm (8"), then the sides of the sofa also project into the zone - they become obstacles, and hence turn orange (it may not be immediate - see glitches listed below).

However, the path itself does not change - you have to select it and click on 'Update Path' for that to happen;  then the path will go around the sides of the sofa.

Obstacle Settings

 
If you go the the Route Analysis Settings, you can add or remove obstacles by category - for example add Furniture and Casework categories to the list that are not obstacles


Initially nothing happens, but when you update the path it will no longer avoid those categories.  These will no longer be highlighted in orange by the 'Reveal Obstacles setting

Furniture no longer an obstacle

Casework category no longer an obstacle - path not yet updated

NB. There is some unexpected behaviour that can occur with the 'Reveal Obstacles' feature:
  • If you already have 'Reveal Obstacles' mode on when you go into the 'Route Analysis' settings, then change the categories - Reveal Obstacles does not update the categories displayed orange/grey (you need to turn it off then on again for a refresh).
  • If Reveal Obstacles mode is on, and you try to select an element:
    • Initially it will highlight all of the obstacles as one item;  select it and you get Analysis results Properties (see below for more details)
    • if you tab select, it highlights a component, but still considers it part of the analysis result;  Select it and you get Analysis Result listed but without any properties;
    • Tab again and it finally selects just the element - you can then change its properties;  However, the Reveal Obstacles highlighting is not updated even when it should be - eg. if the sofa height is changed to 500mm so that the whole sofa becomes an obstacle, the sofa does not turn orange (when it should).
  • If you select the whole analysis result, you get shown properties for the Analysis Result.
  • It is not immediately clear what these properties are for.
  • If you click on the 'Edit..' button (Results Visibility), as you would be tempted to do, you get some more mysterious properties
  •  Make the dialog box a fraction wider, and one of the headings shows in full:  'Analysis Display Style' - it has a hidden button to the right of <By View>

  • Click on the hidden button to reveal the Display Style dialog

  • You can play around with the text and arrowhead settings
 
  • And go to the Legend Tab
  • Click on 'Show Legend'
  • The end result means not much to me, but I'm sure it has a purpose
Arrowheads and legend displayed
  •  You can move the legend on the view, if that is what you need


I am guessing that these analysis display settings are for some other kind of analysis, but have been enabled here too?
  • I am not going down that rabbit hole today!
 

Conclusion

Sadly, useful as this new feature is, it does not address fundamental shortcomings - such as what you need to do when Revit fails to generate (or update) a path at all.

We need more help to be able to deal with that situation, as the Warning dialog box is not at all helpful!

Monday, 18 December 2017

Weird Railing Stuff - part 10 - Split railings

[Edit:  Revit 2019 has a new feature that allows you to split a railing - but all it does is to break the selected railing into two separate pieces that no longer relate to each other.  They can then be separately edited.   But just supposing you wanted to have a single railing element that has a gap in it?  Read on . . . .]
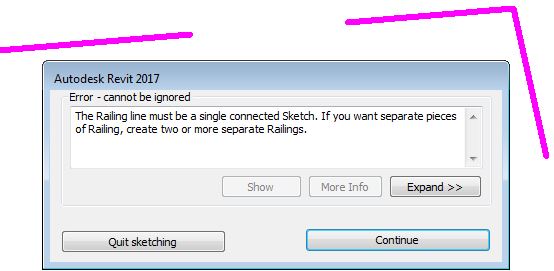
Have you ever tried to create a Revit railing with a split or break in it?  You'd have seen the warning that tells you it is not possible in Revit:

Split Revit Railings

Well, there is a way to do it - yes you can split railings (with lots of provisos, of course).
WARNING: this is another crazy workaround, so use it with caution . . .

In this example, a railing runs through a column, which is not desirable


You may want to break the railing and have a gap either side of the column

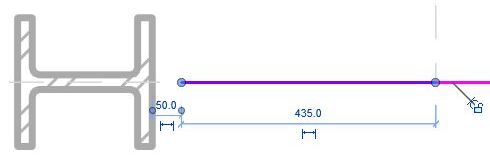
The first thing to do is edit the path of the railing, remove the top segments and stop it short of the column by say 50mm.


Once the top part of the railing is removed, Tab-select the 'Top Rail' (or Handrail) - it is important to select one of these sub-elements, not the overall railing.  NB. if your railing does not have either of these sub-elements, this technique won't work (eg. old style top rails)

Once selected, click on 'Edit Rail'

Then click on 'Edit Path' for the Top Rail

This will allow you to add lines to either the top or bottom end of the Top Rail element; but first it is important to set the workplane depending on whether you are adding to the beginning/bottom or end/top.

Select the name of the workplane.   I don't think that either of the 'Pick' options work here.

The workplane will be parallel to the first or last segment of the overall railing - so you'll need to work in either a 3D view or an elevation/section view.  It may be easier to start in 3D so that you can see exactly what you are doing and where.

This command is not explicit about what is going on - in fact Revit is waiting for you to draw some lines, which will become extensions to the Top Rail (or Handrail)

These lines do not need to be directly linked to the ends of the Top Rail - in fact they can be almost anywhere (in the same plane as the end of the Rail).  Start drawing a line the other side of the column from the end of the railing;  at this stage it may be easier to go into a section/elevation view to ensure that it aligns with the railing on the other side of the stair (but keep an eye on the active workplane).

Trace over the other railing (it should snap to it).

Once the Top Rail extension is complete, it will have a gap where the column is.


Be warned:  This is an extension to the Top Rail only - so balusters will not be attached to the underside of the extension.

Supports will not be attached to a Top Rail, so if you require supports on the extension, make sure before you start that your railing has a 'Handrail' sub-element, and add the extension to the Handrail, not to a Top Rail.  If you switch the railing to a type that does not have a Top Rail, the entire extension will disappear (if it was attached to a Top Rail in the first place).  Plan ahead!


Not surprisingly, this workaround is fiddly and not particularly robust - but I am showing it just in case it helps someone out.  In this example, it would probably have been much easier (and safer) to have two separate railings, but it might give people ideas about a use for this technique, so go for it.

Downsides:
  • Only works with a Top Rail or Handrail in the railing
  •  Top Rail and Handrail extensions are not interchangeable
  • Top Rail cannot host supports
  • Will not host balusters or posts beyond the split
  • Will not turn corners in plan
  • Will not automatically adjust heights/angles if the stair changes
  • Is quite confusing for anyone not familiar with railing extensions