BILT Speaker

BILT Speaker
RevitCat - Revit Consultant
Showing posts with label baluster. Show all posts

Tuesday, 8 February 2022

Stepped Handrail on Stepped Stairs in Revit

A couple of years back I posted on how to create a stair with stepped sides


I always intended to follow it up with what happens to the handrail, and how to solve it?  Well, it is never too late.


Just in case you are wondering how to create the stepped side to the stair run in sketch mode - here is a trick for creating a DIY array in Revit.


When you create a stepped boundary for a stair run, the handrail also becomes stepped, but it is pretty clunky.


Baluster Placement

The first thing to notice is the hideous baluster placement - it is placing one at each change of direction, and one (or more) in the middle of each segment.

To tidy it up:

  • we will probably have to create a new railing type (to avoid messing up the straight railing on the other side of the stair
  • then edit the railing type properties; and the baluster placement
  • Untick the checkbox for 'Use baluster per tread on stairs'


  •  Balusters will only be placed at ends of each segment

Alternatively you could try the opposite: keep the Baluster per tread, but remove the start and end balusters - but then you lose control of the baluster locations in the segments running parallel to treads (not centred).


Top Rail Properties

You may not like the clunky Art Deco look of the vertical "Gooseneck" handrail segments, so the first step is to tab-select just the top rail (not the whole handrail) - then look at its Type properties

  • Change the Transitions from 'Gooseneck' to 'Simple' (or None)
  • Revit will give a not very helpful "not continuous rail" warning:
  • Whichever you choose (Simple or None), you get 'None', as Revit has a headache and thinks it is all too difficult, so it simply can't be bothered to join the segments

Edit Railing Segments

The next thing to try is editing the whole railing path:

  • Select the handrail
  • Edit the path

  • Select the first path segment at the base of the stair
  • Check its properties, displayed on the Option Bar
  • Change the Slope from 'By Host' to 'Sloped'

  • Finish the Sketch
  • Nothing appears to happen to the railing slope!  We will solve that later.
  • Edit the path again
  • Select the next segment that should be sloping (3rd from end)
  • Change its Slope to 'Sloped'
 
This is getting tedious, so let us try a couple of shortcut:

  • Instead of finishing the sketch to see how it looks, you could try the cool new Railing "Preview" feature in the ribbon menu (in a 3D view)
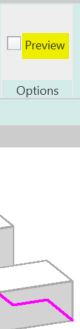
 

  • Tick the Preview checkbox
  • Aaaargh - it does not work when you adjust railing segment properties! It does not show the adjusted slope property.  You still have to Finish the sketch to see the effect


  •  Edit the path again
  • Select several segments to change their Slope property
  • Aaargh - the properties are not shown on the Option Bar when you select multiple segments!
  • Change the Slope properties for every alternate segment - one by one!
  • Finish the Path sketch

Something is wrong with the overall height of the railing when compared to the straight railing on the other side of the stair.  

  • This can be checked in an elevation view

Height Correction

To solve this, one way is to change the Height Correction property of each segment:
  • Edit the railing path again
  • Select the first segment
  • Change its Height Correction property to Custom; with a value to match the riser height
  • Finish the Path sketch
  • The railing height is now correct (more or less)
  • The lowest segment is now sloping

  • Check it in elevation


Now who has a headache?  Not just Revit!

This is a crazy amount of work to do in order to get this sort of correct.

Of course, you could avoid all this by just putting in a straight diagonal railing, but the point of this blog is to demonstrate the problems with stairs and railings - and to show workarounds (however nasty they may be).   There may also be situations where the diagonal railing is not appropriate - perhaps where the stepped sides are much larger steps.


Saturday, 26 January 2019

How Do You Solve a Problem Like Ma Railings?


Have you ever encountered a problem with out-of-control railings in Revit?  OK, so maybe the structure shown above is not a haywire railing, and was meant to be like that, but most Revit users have struggled with trying to model railings as they should be.

How Do You Solve a Problem Like Ma Railings (in Revit)?  *


* with apologies to Richard Rodgers for misappropriating his song title (How Do You Solve a Problem Like Maria? from the Sound of Music, By Rodgers and Hammerstein) - not to be confused with Richard Rogers (no d), the architect who designed many famous buildings, such as the Pompidou Centre in Paris (with Renzo Piano) and the Lloyds Building in London.

Richard Rogers surely did not struggle with trying to model railings in Revit, as those buildings were designed long before the advent of such software.  These days we certainly do struggle with the software - Revit has been around for almost 20 years and it still it does not enable us to model Railings the way we want them (except for the most simple handrail).  There are many problems with the railing tool in Revit, some of which have been documented on this blog - see the list below.  Over the years, we have benefitted from several minor improvements to the railing tool - for which we are very grateful.  However, there is one fundamental problem that has not been resolved - and that is the inability to control the location of individual balusters.

Baluster Placement - a Fundamental Flaw

The railing sample file shows some relatively complex looking examples - but these are just straight runs on the level.  As soon as you try to use them on stairs, things start going wrong with the baluster placement.

This example is done using two alternating balusters - one is just a post, while the other is glass with fixings.  The glass baluster is very good at adjusting the angle of its top and base (if you create the family properly). 
 
When it comes to spacing, it is pretty hopeless:  you get gaps whenever there is a break in the pattern.
Standard railing with glass balusters
There are some limited controls within the baluster placement type properties, but no single combination of settings will ever work on the whole stair railing.

Spreading the pattern to fit does resolve some issues, sometimes. . . .

Changing the 'Break-Pattern' property to 'Never' can have some weird results

Reverting the pattern to 'Centred' does not fix it either - you may end up with panels across a change in angle, where the panel is not trimmed properly.

Workarounds

There are a number of ways that people get around these problems, but none of them is satisfactory:

1.  You can try using 'Handrail Supports' to represent balusters, but that has at least two problems:
  • Handrail supports do not respond to changes in angle of the stair, so you need to build that in as a user control that has to be manually set every time
  • Handrail supports can be unpinned and then moved (or changed to another type), but the moving process is very tricky - see Moving Handrail Supports
    It is also possible to very easily lose the positions by accidentally resetting the railing.
2.  Model the glass as a continuous rail element, use balusters and/or handrail supports to represent the fixings and vertical joints in the glass.  More on that another time.

3.  Model the railing 'in-place'.  This is a really bad idea as it screws up the subcategories, visibility etc;  And worse still, it does not update when the stair changes

4.  Just model a Top Rail / Handrail (with no balusters), which shows up in plan.  Document the railing in 2D as drafting views or as detail elements on stair sections.  This is a terrible solution (very un-Revit-like), but it can save huge amounts of modelling time - so it is done quite commonly in the industry.  Of course, it can lead to errors on site . . . .

Railing Fixes

If we had the ability to control the baluster placement in much the same way that curtain walls operate, it would help resolve this fundamental flaw in the railing tool;  this would require the ability to include variable width panels too.  Of course there need to be many other minor fixes in addition to that. 

On the Autodesk Revit Roadmap, Railings were flagged as 'fixed', a couple of years ago, on the basis of a number of minor enhancements.  Clearly it is nowhere near being fixed - see this request on 'Revit Ideas'  Railing Overhaul - Resolution of Limitations - from Chris Price (Mr Spot).

Weird Railing Stuff Blogs

Over the last few years I have posted many blog articles on the many weird quirks of using Revit to model Railings.  Some articles just document the inconsistencies and strange behaviour - just so you know what is going on; other articles offer some workarounds and ground-rules that might help you along:

Revit Railing Enhancement Requests

Autodesk  have a 'Revit Ideas' website that allows you to vote for enhancement requests.  I have compiled a list of stair/railing related ideas - please, all of you vote for some of these requests - if you don't vote, Autodesk will continue to consider them as fixed.

Monday, 7 January 2019

Weird Railing Stuff - part 15 - Railing Lateral Offsets

I started out writing about the 'Handrail Hand Clearance' property of Railings in Revit - then I realised that it would involve analysing all of the related lateral offset properties associated with Railings and each different component.  It turns out to be a real "dog's breakfast", with at least six different ways to offset railing components, with minimal consistency between them all.  So I decided to document that first before looking at how it all affects 'Hand Clearance'.
Colour coded railing sub-elements
The above view of a railing is colour coded to help distinguish each sub-element; it is set at an oblique angle so that offsets are clear to see in the following examples with exaggerated offsets of 500mm.

A Dog's Breakfast

Railing Sketch line.

When a railing is placed automatically on a stair, it has a sketch line, that is typically on the edge of the run/landing.  All railing lateral offsets relate back to this sketch line location.

1.  Offset From Path


This is an instance property, which is applied to the whole railing and all its sub-elements.  
It represents a notional centreline of the railing, offset laterally (sideways) from the railing sketch line, which is placed on the edge of stair runs and landings by default.


Unfortunately there is a built-in system default value of 25.4mm, which is one inch.  The logic to this is obscure - it only works if your top rail happens to be 50.8mm (two inches), and where the face of the top rail needs to align exactly with the edge of the run/landing.  Why is this so bad?
  • This never, ever works in the metric world (all but two countries in the world) - even if we have a 50mm top rail there is still an 0.8mm discrepancy every time; Occasionally it might suit a situation in the imperial world, as described above;
  • This never works when the stair abuts a wall (metric or imperial) - see what happens to supports later on.

This default value is infuriating - as you have to correct every single stair railing after placement.  In my opinion it should be a default that we can control in some way (either a 'last placed' setting or in the Revit.ini file);  alternatively it should be a Type property rather than instance.  Please vote here on Revit Ideas if you agree with me - if this blog has helped you out, then please help me out by voting.

2.  Old-Style horizontal rails


The old Type Property dialog box for horizontal rail structure has a separate 'Offset' property for each rail element.  This does not used the word 'lateral' anywhere on the dialog box, so you have to guess which of the three possible directions it will offset (x, y or z), as well as which is positive or negative.

3. Baluster Placement (Individual Balusters)


The Baluster Placement dialog has a separate 'Offset' property for each baluster element.  This does not used the word 'lateral' on the dialog box, so you have to guess that it is a lateral offset property - although there are also Base and Top offsets, so it is easier to identify.


Warning:  This individual Baluster Offset property goes in the reverse direction to most other offsets:  A positive value pushes the baluster outside the stair, while a negative value goes in towards the stair - this is inconsistent with most other railing offsets.

4.   Post Placements

Railing posts are similar to Balusters (with the same reverse direction offset)

5.  Baluster Offset (and Top/Handrail)

Back in the Railing Type Property dialog box, there is another property called 'Baluster Offset' - another guessing game ensues.

This can give very unpredictable results.  It will laterally offset all of the balusters by the same amount;  it does not affect the horizontal rail structure.  With the old style railings, it was confusing enough because the individual Offset goes one way, and the overall baluster offset goes the other way. However, with the new style railings* it is almost incomprehensible :
  • The balusters will all be offset laterally by the same amount.  Unless . . . .
  • If an individual baluster offset value has been applied, it is cumulative, so the individual is added to the master baluster offset property (bearing in mind that a positive value for one may cancel out a negative value in the other).
  • Old style horizontal rails will not be affected (they get left behind).
  • New style 'Top Rails' will be offset.
  • New style 'Handrails' will be offset.


The net result of all this is that the Baluster Offset property may work as a Type control offset for the whole railing, provided that you don't have any old style mid rails - in that case you have to offset each of those in the Rail Structure dialog box.

* New style railings were introduced from Revit 2013 onwards, but old style railings were not automatically upgraded - only if you've swapped to the new style railings!  You may still have old-style railings in your projects.

5A.  Rest

Are you still following all this?   If not, (or you have a headache) just have a rest or lie down for a few minutes, before moving on to the next one.  I can't say it gets any better . . .
Deconstructed Railing

6.  Handrail

New style railing Types have handrail properties - these include "Lateral Offset" for each handrail, which are greyed out. 

The Lateral Offsets are calculated by the system, depending on the Handrail type properties.  This represents the offset of the Handrail centreline from the notional Railing centreline (which is in turn affected by the "Offset from Path" property . . .)
Refer to Rail Hand Clearance Property for how this is calculated.

If you change the 'Hand Clearance' property it will move the centreline location of the Handrail relative to the overall Railing.
  • This has to be done in the Handrail Type properties dialog box, not in the Railing properties.

7.  Right Handrail

The above example assumes a handrail is set to 'Left' Position.  If it is set to 'Right', the whole handrail is mirrored and offsets outside the stair.

8.  Top Rail

Top Rails also have a 'Hand Clearance' property, but unlike Handrails, this is not displayed as a Lateral Offset in the Railing Type properties.


The Hand Clearance property of of the Top Rail most assuredly does affect its Lateral Offset - so it would be mighty useful to have that property displayed, even if you want the Lateral Offset to be set to zero most of the time.

Why oh why is it missing?


One possible reason it is missing might be that the offset direction is the opposite to Handrails - a positive Hand Clearance on a Top Rail would give a negative Lateral Offset.

9.  Sketch Offsets

I would not be surprised if there are other Offset properties that I have missed.
There is at least one more way to move Railings, aside from playing with the properties:
  • Edit the stair sketch and 'Offset' the sketch lines from their original location.
  • I would not recommend doing this on stairs without good reason, as it would make the properties even more confusing.
  • If the sketch lines go outside the run or landing (laterally), you would most likely encounter hosting and height problems - so that is not advisable.


If you are confused by all this, it is hardly surprising.  I will try to shed some light on how to manage these offset properties in future blog posts. . . . .