BILT Speaker

BILT Speaker
RevitCat - Revit Consultant

Sunday, 8 March 2015

Copying Views Between Revit Projects

I figured out how to copy perspective views between Revit projects a few years back.  I see that this topic has been addressed in various blogs and forum posts, but maybe not comprehensively, so I reckon its worth putting it all in one place for reference.

There are several methods to copy views, depending on what view type and where you are in the project browser.
  • Copying a view between projects is quite different from using the 'Duplicate' command because that command only works within a project.
  • Selecting a view in the project browser does not generally allow you to copy it - the copy icon is not available, nor is there a 'Copy' option when you right-click on a view name (Drafting views and schedules are the exception).
  • Copying views between projects does not usually copy associated annotation objects, with the exception of drafting views.  Annotation has to be selected and copied separately after the view is copied.
  • None of the following methods will work between different Revit sessions - however, I see no reason why anyone should open more than one Revit session anyway.

Copying Drafting Views & Schedules

Drafting and schedule views can be copied from one project to another by two methods:
Method A - Copy & Paste
  • Select a drafting view or schedule in the project browser
  • Right-click and choose 'Copy to Clipboard'
 
  • Go to the other project
  • 'Paste' from Clipboard

  • Regardless of where the focus is (Project Browser or canvas), it will paste the view into the other project

Method B
You only need to open the project to be copied into, and use the 'Insert from File' command
  • Then select the project that you want to copy views from - it will list allowable view types, and even preview them.
  • It will also allow you to copy sheets that have only drafting or schedule views on those sheets.
  • As soon as sheets have other view types on them (including legends), it will not even list them in the Insert Views dialog box
 Method C
  • If a drafting view that you have copied by method A or B contains callouts to other drafting views, they will be copied across into your project, even if they are not on the sheet (in the case of inserted sheets) - and the callouts will link correctly.  
  • NB. this does not occur when drafting view callouts are contained on other views types that are copied (sections, detail or plan views etc).
  • If you try to copy a plan or section by selecting its view crop boundary, you can also select a drafting view callout on that view - it will also be copied to clipboard.  However, when you paste the view, it will bring along the callout but disassociate it from the drafting view (which it does not copy across).

Copying 3D Views (isometric or perspective)
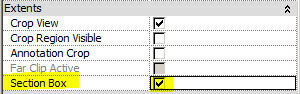
Copy Method 1.
If you have a 3D view open, you can select the view crop boundary, then right-click and copy or else use the copy to clipboard icon from the ribbon.
 
Copy Method 2.
If you have another view open, you can find the view name (to be copied) in the project browser, then right-click on it and select 'Show Camera'
It will show the camera definition of the selected 3D view (be it isometric or perspective)
 
Then you can copy to clipboard

Paste Method 1
If you are in a plan view in another project, all you need to do is 'Paste Aligned to Current View' and the identical 3D view definition will be created in the same location.
Paste Method 2
  • If you are in a 3D view in another project, when you try to paste the 3D view it will not give you the option to paste to the current location.  
  • You have to paste to a Selected level (choose the appropriate one);  
  • if you try to 'Paste from Clipboard' you will not be able to get the view into exactly the same location as it was in the first project - so that is not recommended.

Copying Plan Views

You can use the same method (1) for copying plan views between projects:
  1. Select the view crop boundary of the plan view, 
  2. copy to clipboard
  3. Go to the other project
  4. Paste - Aligned to Current View or to Selected Level
  • If you paste to Current View, it will create a new plan view associated to the same level as the current view;  if the original associated level name exists in the new project it may be named 'Temp.Level 1' regardless of the associated level or the original name;  if you paste again, it will create a new plan view named 'Temp.Level 2' 
  • If you paste to Selected Level, it will create a new view associated to that level - again named 'Temp.Level 1' (or the next number in sequence), not the actual level number.
  • It will not copy associated annotation from the original view, unless you select those at the same time as the view crop boundary
  • It will copy most view properties of the original view, but not an associated View Template, even if that same view template exists in both projects.

Copying Section Views

You can copy a section view easily by selecting the section marker in plan (or the section view crop boundary in the section view itself)
  • When you paste the section into another project you need to remember to go to the same level it was copied from before pasting to Current View (or Selected Level) otherwise the heights will be different.
  • Section view properties will be copied, with the exception of assigned view templates.

Copying Elevation Views

You can copy an elevation view either by selecting the elevation marker or the individual elevation itself;  if you copy the whole marker it will include associated elevation views
 

Copying Area Plan Views

You can copy Area Plans by selecting their view crop boundary.
  • When you paste them, they may retain the view name - if the associated level from the view in the original project does not exist in the new project; otherwise it will rename to a temp view name.
  • You can paste them to multiple selected levels, in which case the views are renamed with a number suffix, which do not relate to the levels that they become associated with - so you need to rename them

Copying Detail Views & Callouts

  • You can select a callout from a plan, section or elevation view, then Copy to Clipboard
  • Alternatively you can select the view crop boundary and right-click to copy it
  • You can then go to the recipient project and paste Aligned to Current View or to Selected Views or Same Place (but not to Selected Levels)

  • The detail view will be created and a callout placed on the view that you selected;  if a detail view of that name already exists it will rename the new one with the next number suffix.

Copying Legend Views

I have not found a way to copy legend views between projects - legend views do not allow view crop boundaries.  So, what you need to do is to create a new legend view in the project, then copy and paste all the annotation objects from the original legend view in the other project.

Make sure that your new legend view is the same scale as the original, otherwise text and symbol size will appear to change.

Copying View Templates

View templates have to be copied by a totally different method:
  • Open both the projects that you want to copy from (donor) and to (recipient)
  • In the recipient project, go to 'Manage' 'Transfer Project Standards'
  • Click on 'Check None' to deselect all items in the list
  • Select View Templates
  • Click OK to proceed - it will copy all view templates from the donor project into your active project - you have no choice in the matter.
  • NB. If you want to copy only a few view templates, you could create a new intermediate project;  import all view templates into that; remove the ones you don't want from the intermediate project; then transfer the remaining ones from the intermediate project into the recipient project.
  • When you copy views from one project to another, it copies most view properties, but not assigned view templates.  In that situation, you would need to transfer the view templates separately (as described above), then manually reassign to each copied view.

More on Copying Sheets and Views

Refer to this link to find out how to copy sheets between projects
Also Copying contents of 3D views between Projects
and  Duplicating Views with Linework Overrides (within projects)

Please add a comment if you know more or better ways to copy views between projects.

Saturday, 28 February 2015

RTC 2013 NA Competition Entry - More Revit Repeaters

Revit Museum of Innovation

Here is another image that was part of my drawing competition entry at RTC 2013 in Vancouver.  This is the outdoor view of the Revit Museum of Innovation - to go with the indoor image shown in this earlier blog post.  The image was created using 100% Revit - that means no Photoshop, no API, no Dynamo, no background jpegs.  The purpose of the image was to show what can be done using Repeaters in Revit - most of the techniques were described previously, with the exception of the conical sculpture and the background sky:

Conical Sculpture

There is a (hidden) half conical mass that has its surface divided. 
 The U grid is rotated by 30 degrees, which gives a spiral effect
 
On one of the nodes of the divided surface was placed one adaptive star component that changed its shape depending on how far it was from a specific reference point - that point being a second adaptive point snapped to an adjacent node on the spiral of the divided surface.

 When the adaptive star component is repeated, it replicates itself along the spiral path;  as it goes up the cone, the nodes become closer together and the star gradually changes shape until it becomes a hexagon, and then almost a circle.  This technique of using two circles with variable diameters to drive hosted geometry was described a couple of years ago - Revit Repeaters and Flexing Star Adaptive Components
Of course the cone itself had parameters to control its height and proportions, which in turn changed the patterns applied to its surface.

Background Sky

Notice the colour/lighting gradient in the background - it changes horizontally.
Originally I was trying to use the View Background settings to create a gradient between sky and horizon

The sky effect looked ok on screen, and when I did a screen capture:
The screen resolution and captured image were not good enough to project on a screen at RTC or to print out at A3.
But as soon as I tried to print it or export a jpeg image, it created a banded effect - this was in Revit 2013 at the time.   This bug was subsequently fixed in v2014.

At the time I had to make do with the buggy version 2013, so I resorted to an old technique for creating sky gradients:
I created a giant blue cylinder around the model, so that the viewpoint could see the inside of the cylinder as a background - as seen in the final artwork shown at the top.

For more about Revit Repeaters, refer to the Repeaters Index page

Sunday, 15 February 2015

Revit Computational Design - RTC 2014 Competition Entry

Pump up the Volume - Computational design with slider controls

Above is an image of my competition entry for the innovation category of the drawing competition at RTC 2014.
It may not be such a flashy image, but the intent was to show innovation in the use of Revit as a design tool using 100% pure Revit without any Dynamo or API add-ins.

What is in the image?

  • On the right is a mass model representing a twisting building with a sloping top;  the green rectangle represents an angled "solar access cutting plane" that prevents the building going any higher than defined but adjustable height controls.
  • On the left is a series of slider controls that can be used to change the dimensions of the mass model, along with its degree of twist; 
  • There are also slider and rotating controls for the solar access cutting plane, which set the base cutting height, sun angle and azimuth so that overshadowing can be evaluated at different times of day and year just by rotating the dials in Revit.
  • There is also a mass floor area schedule and tags that automatically update, as well as calculate the Floor Space Ratio (FSR) of the building mass.

How was this done?


  • The slider controls are line based components, placed into a model;  they have shape handles that can be dragged
  • The Mass family is an in-place mass that is built onto a series of adaptive component rigs
  • The Adaptive Component rigs have several free adaptive points that are snapped onto the sliders;  the distance between the adaptive points is measured using reporting parameters
  • Changes in reporting parameter distances drive changes in the adaptive rigs, which in turn change the mass family that is hosted onto the rigs.
All of this is clearly described in the handout notes that accompanied my presentations "Pump up the Volume" at RTC 2014 in Australia (Melbourne) and North America (Chicago).  Hopefully I will get time to publish the technique in more detail on this blog in the future.  Alternatively you can download the presentation from the RTC website if you attended either conference;  or wait until they become available on AUGI later this year.


Refer to this post for a link to a youtube video

Thursday, 15 January 2015

Revit's Most Hidden Commands (part 4) - 3D Cut Pattern


This Revit feature really is obscure, and I can never remember how to do it without looking online for solutions.  Plenty of people have posted on blogs and forums about this one, but I have my own slant on it.  Most of the references to this are something like "How to create sectional perspectives in Revit" - and then describe how to apply a colour pattern to the cut surfaces of the section.

Applying Colour/Hatching to Cut Edges on a 3D View

1. 3D View.
In fact this technique applies to any 3d view, perspective or otherwise - but only if a section box is applied as a view property:

2. Section Box
3. Section Box Cutting

A section box will actually crop the 3d model (only in the view).  This is not to be confused with Crop View and Scope Box which only crop the view, not the model.
Make sure that the extents of the section box are cutting the model where you want - drag the shape handles.  In a perspective view it may not be so simple - other blogs describe this process well (Use View cube to temporarily make perspective orthogonal;  adjust section box; rewind view back to perspective).
You can hide the section box in 'Visibility Graphics', but don't uncheck the box in the view properties.
 

There are several subtle settings that control how and when the coloured cut edges are applied:

4. Coarse Detail
  • It only works when a view is set to Coarse Detail Level (not at medium or fine)

5. Coarse Poche Material
[Edit:  This section added later]
Once the view is set to coarse, and has a section box activated, Revit will automatically apply the 'Coarse Poche Material' to any edges that are cut by the section box.  This material is is controlled by a 3D view Type property - so it will affect all 3D views of that type.
  • In the standard Revit project template this property is set to "By Category", which means that nothing appears to change - it uses whatever the settings are for each category.
  • In some project templates this value may already be set to a particular material, in which case that material will automatically be applied to cut edges.  Typically that material would be a special material called "Poche"- this is a system material that is present in all templates (including families).  [If you delete that material, it will pretty soon come back into your project or family!]
Before changing the Coarse Poche Material type property, it is recommended that you duplicate your 3D view type, unless you want to apply it to all 3D views.

When you click on the value for the property, it will automatically default to the "Poche" material


Select the Poche material (or some other material)

It will apply the material properties to cut edges according to the following rules (maybe . . .):

6. Material Properties
  • By default, the Poche material has a dark blue shading colour and NO cut hatching pattern - you can change this of course.

  • This means that the colour will only appear if the view is set to Shaded, and not appear if the view is set to Hidden Line
Medium View, Hidden Line - No poche material is applied

Coarse View, Hidden Line - No cut Shading visible
  • Once the view is set to Shaded, the shading colour appears - this is standard Revit behaviour, but in the context of the other variables it can be confusing
Coarse View, Shaded - Shading Colour is visible
  • You can also add a cut hatching pattern to the Poche material

Coarse View, Shaded - Shading & Cut Pattern visible
  • If you have a cut pattern defined for the material, you can revert to a Hidden Line view and it will display the hatching but not the shading colour (again, this is standard revit behaviour)
Coarse View, Hidden Line - Only Cut Pattern is visible
  • Alternatively you can use a solid fill colour for the cut pattern, and this will display on a hidden line view

Coarse View, Hidden Line - Cut Pattern (solid colour) is visible
If you have a shaded view and a solid colour cut pattern, things start getting tricky (if not downright weird):
  • If the shading is set to zero transarency, it will show neither the shading colour, nor the solid fill colour - ie. the clash makes Revit give up and show no poche.
  • If you set the shading to semi trasparent, it shows the solid fill colour but at the shading transparency!!!
Coarse View, Shaded - solid fill pattern, 50% shading transparency

No wonder I can never remember this setting - it is so obscure and has so many variables to juggle in order to get it working.  If you forget just one variable, it may not work at all.

Checklist:
  1. Any 3D view (perspective, Isometric etc)
  2. Section box must be active (although it can be hidden in Visibility Graphics)
  3. Section box must cut through the model (Poche material only applied to cut surfaces)
  4. Coarse Detail Level view
  5. 3D View type properties - Coarse Poche Material property
  6. Poche material
  7. Shaded View  shows poche Shading colour (and cut pattern if it has one)
  8. Hidden Line View shows poche cut pattern only (nothing displays if no pattern is set)
  9. Shaded View + Solid Fill cut pattern + Shading colour =  ??
[Edit] This is a whole lot more complicated than I first realised.  The  "Coarse Poche Material" for view type properties (as pointed out by "Alm" in a comment) may or may not be preset in your project - if it is set to Poche, then it works according to the rules above (as it did during my initial testing);  if it is set to 'By Category' then it will not work, or at least it follows different rules depending on various settings for each category.  These will be described in another post . . . .

Monday, 12 January 2015

Revit's Most Hidden Commands (part 3) - Curtain Pattern Grid Size

This setting is maybe not so hidden but it has caught me out a few times - when working with curtain pattern grids, it is not so obvious how to flex the family by changing grid sizes.

  • Create a new curtain panel pattern based family
 
  •  It has a grid with adaptive points and lines already set up
  • How do you change the grid size?
  • It is quite simple really - just select the grid itself and you can see its instance properties
  •  Change the values to something smaller, or different to get a rectangular shape
 
 
  •  Or you can change to a totally different pattern
  • Note how Revit automatically adds (or removes) points and lines to achieve a pattern on the underlying rectangular grid
  •  This one is a Not so hexagonal grid when you look at in plan!
If you want a true hexagon, you need to take a totally different approach - but that is for another blog post.

Wednesday, 7 January 2015

Revit Repeaters - RTC 2013 Competition Entry

Revit Repeater artwork
This image was part of my  entry for the drawing competition at RTC 2013, in the innovation category.  It was created using 100% Revit, without the use of Dynamo or any add-in APIs.  It was done to demonstrate some of the capabilities of the new "Repeater" command that was added to Revit 2013.

The museum building wall was created as a mass family, consisting of a curved spline in plan, extruded upwards to represent the outside facade;  its surface was divided into a rectangular grid.  A five point adaptive component panel was placed on one rectangle of the grid, with one of its points snapped to a common control point off the surface of the wall;  the panel was then repeated across the entire facade;  the size of the window in each panel was controlled by its distance from the control point - using the "reactor principle" described on Zach Kron's Buildz blog (a complex formula defined a sine-wave pattern for the change in window size).  Hopefully I will get time to document the technique on this blog eventually!

The artwork on the wall was done using two-way repeater pyramids that change shape depending where they are in the pattern - refer to how-to-schedule-panel-locations.

The people were single-point adaptive components consisting of lofted circles that had parametric diameters at various heights up the body, used to create different body shapes for each family type. The people outside were turned into repeaters by hosting six of them on divided splines, then using the repeat command - thus forming queues of people snaking into the museum entrance.

The signage on the roof of the museum was done with adaptive component (model text) repeaters that automatically rotate to face the camera - refer to my Mona-lisas-eyes-follow-revit-camera blog post.

The ground surface texture was done by creating a divided surface with slightly distorted adaptive components placed in a pattern of four and then repeated.

For more on this competition entry see the outdoor image of the museum