BILT Speaker

BILT Speaker
RevitCat - Revit Consultant
Showing posts with label escape path. Show all posts

Sunday, 2 June 2013

RTC and Revit Egress/Escape Path Update

RTC Australasia 2013

At the Revit Technology Conference (RTC) in Auckland a couple of weeks ago I learned a whole lot of new tricks in Revit.   I usually think that if I learn one or two things that might save me hours or even days of work in Revit then it is worth attending the conference.  This time I learned a whole swathe of new techniques, including (but not limited to):
  • How to scale families by 5 different methods in Revit (and I thought it was not possible at all);
  • How to control rotation of elements in all axes and directions in a family;
  • How to morph elements in a family;
  • How to create walls, roads and fences that follow a toposurface exactly;
  • How to get a chameleon to persuade a grasshopper to talk to a frog (Revit) ;
  • and the list goes on . . .
Many thanks to Marcello Sgambelluri, Alfredo Medina, Andrew Willes and all the others who taught me new things.  I'm sorry I missed so many other sessions that sounded interesting too.
I also did a presentation in Auckland titled "Fractal Fun with Revit Repeaters and Adaptive Components".   If that sounds complicated, it was actually a lot of fun - and I learned a lot in the research and testing that I did to prepare for it.   For those who missed it, you have another chance to see a new improved version of the presentation in Vancouver at RTC NA in July.  Luckliy I had "Fun" in the title because my presentation followed straight after the keynote speaker Nigel Latter, a psychologist and local TV celebrity - his talk was entertaining, but also had a serious message about how to deal with change (and how to deal with difficult people who are resistant to change!).

One of the other great things about RTC is that you get to talk to other users and Revit experts about what you have seen and heard.  This often leads on to other new ideas.  One of those discussions was about creating Escape or Egress paths in Revit - and this led to some new methods I could use for the adaptive component that I created last year:
Escape Path Adaptive Component

Update on Escape Path Component


The new idea came out of one of Marcello's new methods for scaling families - to play around with the adaptive point properties so that they behave differently in the project.  Comments on my earlier post rightly pointed out that there would be a lot of extra mouse-clicks if you did not require all the segments of a particular escape path component.  However, it is possible to change the properties of each adaptive point so that they are either:
  • a "Placement Point", which requires a mouse-click from the user when the component is first placed;  or
  • a "Shape Handle Point", which does not require a mouse-click on placement, but does allow the user to move it after placement - at which time it behaves as an adaptive point that will move/change any geometry that is linked to it.


What this means is that you could make the first three adaptive points as placement points, and all subsequent points as shape handle points.  So the user initially has to place only the first three points (two line segments);  subsequent points would only come into play if those segments are activated using the visibility switch.

The downside of this idea is that all of the shape handle points are selectable in the project even when their visibility (and the line segments) is turned off - although moving them  would not have any effect if their segments are turned off.


To see how to create the egress path component, refer to:
Escape Path Adaptive Component

Sunday, 15 April 2012

Escape Path / Egress Travel Distance Component

It is common for architects to need to calculate, check and record escape paths or egress travel distances in a building design.  Revit does not have an inbuilt method for doing this.   I've seen many suggestions on how to do this in Revit, but they are all pretty clunky, mostly involving several components and tags and schedules. 
In Revit 2012, there was a new way to do this using adaptive components.  I did not publicise this before, because there was a bug in the software that prevented it from working 100% reliably - but in Revit 2013, that bug has been fixed, so here is how to do it:

This method will create a 2D travel path (calculating distances in plan only).

  1. Create a new adaptive component (use "Generic Model Adaptive" template)
  2. Place a point on the intersection of the two reference planes;
  3. Place another three points in a line along the X axis, and 
  4. Make all the points adaptive
  5. In Object Styles, make a new subcategory called "Escape Path", with a suitable linestyle – say red, dashed, heavy lineweight.  Ensure that you choose the right category to put it under (generic, if that is your family category) – as all categories are listed.
  6. Draw a line between points one and two, using 3D snapping.

  7. Change the line to the Escape Path subcategory.
  8. Join points 2 & 3 with a similar line, then points 3 & 4.
  9. Place a dimension between points 1 and 2, using the Ref. level as your work plane – this will give you horizontal measurements in plan.  NB. Be sure to attach the dimensions to the actual points (not line ends) otherwise the reporting parameters will not allow you to use them in formulas.
  10. Select the dimension, give it a parameter “Plan_Length_1”
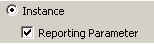
  11. This must be set as an instance & reporting parameter
  12.  Repeat this process between points 2 & 3, then points 3 & 4.
  13.  Flex the component by moving each point; NB. do not click and drag (it will move in z direction) - use the arrows
  14. Create a new Instance length parameter called “Total plan escape distance” 
  15. Give it a formula: “Plan_length_1 + Plan_length_2 + Plan_length_3
  16.  Tick the “Always Vertical”  family parameter – this will ensure that measurements are always true in plan (they can be slightly out if you don’t tick this).
  17. Save and load the family into a project; and it should prompt for 4 points when placed.
  18. Once placed it should report back the total escape path length, in its instance properties.
 To make this component more useful you could add some more checks and controls:

  •  A counter (integer parameter) for the number of segments, using visibility to hide unwanted segments and calculations to remove them from the total; When placed in the project, it will still require all the adaptive points to be place, but it will just ignore anything after the required number in the counter.
  •  A user defined parameter for maximum allowable length;
  •  A calculation to see if the total length exceeds the maximum;
  • A warning if the maximum is exceeded – this could either be a change of colour in the lines, or else an element that is normally hidden, but has its visibility turned on if the total length exceeds the maximum.  NB. If you want a text warning, it has to be done as model text nested in a generic component loaded into the adaptive family.

     
  • This example only has 4 segments, but you could add more - of course then you'd need more visibility and calculation parameters.
  • You could also create a version that measures distances in 3 dimensions.  To do that you need to host the reporting parameter lengths on reference lines drawn between each adaptive point - this would then measure the diagonal distance if any of the adaptive points are moved up in the Z direction.
  • If you make the Total distance a shared parameter, then you should be able to schedule and tag it.
Warning:  In order to avoid the v2012 bug, you must start with a v2013 family template.  It will not fix the bug if you start from a v2012 template and upgrade it.

Please use this technique at your own risk - it is entirely up to you to check that it all works properly, and that it meets your local standards for egress travel distance / escape path measurement.  Revitcat accepts no liability whatsoever for the creation and use of this technique.  For this reason it is not possible to post a copy of this component here, so you need to create it yourself from scratch from a v2013 adaptive family template.

Youtube demo of escape path component in use