
It is common for architects to need to calculate, check and record escape paths or egress travel distances in a building design. Revit does not have an inbuilt method for doing this. I've seen many suggestions on how to do this in Revit, but they are all pretty clunky, mostly involving several components and tags and schedules.
In Revit 2012, there was a new way to do this using adaptive components. I did not publicise this before, because there was a bug in the software that prevented it from working 100% reliably - but in Revit 2013, that bug has been fixed, so here is how to do it:
This method will create a 2D travel path (calculating distances in plan only).
- Create a new adaptive component (use "Generic Model Adaptive" template)
- Place a point on the intersection of the two reference planes;
- Place another three points in a line along the X axis, and
- Make all the points adaptive

- In Object Styles, make a new subcategory called "Escape Path", with a suitable linestyle – say red, dashed, heavy lineweight. Ensure that you choose the right category to put it under (generic, if that is your family category) – as all categories are listed.
- Draw a line between points one and two, using 3D
snapping.

- Change the line to the Escape Path subcategory.
- Join points 2 & 3 with a similar line, then points 3 & 4.
- Place a dimension between points 1 and 2, using the Ref. level as your work plane – this will give you horizontal measurements in plan. NB. Be sure to attach the dimensions to the actual points (not line ends) otherwise the reporting parameters will not allow you to use them in formulas.
- Select the dimension, give it a parameter “Plan_Length_1”
- This must be set as an instance & reporting parameter
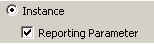
- Repeat
this process between points 2 & 3, then points 3 & 4.

- Flex the component by moving each point; NB. do not click and drag (it will move in z direction) - use the arrows
- Create a new Instance length parameter called “Total plan escape distance”
- Give it a formula: “Plan_length_1 + Plan_length_2 + Plan_length_3
- Tick the “Always Vertical” family parameter – this will ensure that measurements
are always true in plan (they can be slightly out if you don’t tick this).

- Save and load the family into a project; and it should prompt for 4 points when placed.
- Once placed it should report back the total escape path length, in its instance properties.

- A counter (integer parameter) for the number of segments, using visibility to hide unwanted segments and calculations to remove them from the total; When placed in the project, it will still require all the adaptive points to be place, but it will just ignore anything after the required number in the counter.
- A user defined parameter for maximum allowable length;
- A calculation to see if the total length exceeds the maximum;
-
A
warning if the maximum is exceeded – this could either be a change of colour in
the lines, or else an element that is normally hidden, but has its visibility
turned on if the total length exceeds the maximum. NB. If
you want a text warning, it has to be done as model text nested in a generic
component loaded into the adaptive family.

- This example only has 4 segments, but you could add more - of course then you'd need more visibility and calculation parameters.
- You could also create a version that measures distances in 3 dimensions. To do that you need to host the reporting parameter lengths on reference lines drawn between each adaptive point - this would then measure the diagonal distance if any of the adaptive points are moved up in the Z direction.
- If you make the Total distance a shared parameter, then you should be able to schedule and tag it.

Please use this technique at your own risk - it is entirely up to you to check that it all works properly, and that it meets your local standards for egress travel distance / escape path measurement. Revitcat accepts no liability whatsoever for the creation and use of this technique. For this reason it is not possible to post a copy of this component here, so you need to create it yourself from scratch from a v2013 adaptive family template.

Youtube demo of escape path component in use
