BILT Speaker

BILT Speaker
RevitCat - Revit Consultant
Showing posts with label install. Show all posts

Saturday, 25 September 2021

Revit 2022.1 So Good it Trashed the Installer

 Excited by all the hype about Revit 2022.1, I just downloaded and installed it.

All went well apart from a couple of minor glitches:

1 - Parallel Installs

It decided that it could not install more than 33%, and sat there for ages before announcing that it had failed due to some other install going on.  I have no idea what it was - some kind of system update, which required a reboot?

After rebooting the computer the install worked smoothly and quickly

2 - Trash the Installer

After completion, I decided to make a backup of the installer software and remove it from the hard-disk to save space - all 851 Mb of it.

Where the heck was it?  I searched high and low - in the Download folder?  In the Software folder that I had previously moved it to?  No.  

Eventually I found it in the 'Recycle Bin'.  How did it get there?


I may be getting a bit forgetful, but I surely would know if I had somehow deleted the installer?

Could it be that Autodesk have built this "Self-Destruct" capability into the installer?

Or could it be some new trick that Windows 10 performs?

Conclusion

If you want to save time, reboot your computer, and then make a backup of before installing this update.

Now I look forward to testing the new features

Friday, 19 June 2020

Installing Revit 2021 - more Space Junk

Last year I did an analysis of how much space Revit takes up during the download and install process for the latest version (2020.

Here follows an update for some of the changes in v2021:

Download and Extraction

The download file size is much the same as last year 15.7Gb - all sorts of useless stuff along with the small amount that I actually need for Revit itself!

The download/extraction process still needs 45Gb+ of free space on your hard disk - a challenge for me with a SSD of only 208Gb.   I forgot to read my notes from last year - the extraction process failed again as it needed just a bit more than 29Gb I had free after the download (15.7 + 29 = 44.7Gb total free).

Installation

Having completed the extraction process (by double clicking on the first downloaded file), it gave me an error message saying that it could not proceed with the install.  Well, that was fortunate because I don't want it to go straight from Extraction to Install - I see those as separate processes anyway.

The first step is to move the 7 downloaded files to safe place - off your hard disk to free up 15.7 Gb.  It is curious that the extracted files are also 15.7Gb - why are the downloads not in a compressed format?


Once the install process starts, it seems the same as previous years but there are some subtle differences:
  • Content is not automatically installed.

Content

The release notes make no mention whatsoever about the changes to the default installation of content - you either have to refer to Dan Stine's AEC Bytes article to find this, or dig deep in the Autodesk help file to find notes on the significant change to content installation.

  • What this means is that all the normal content that was previously installed with Revit is no longer done automatically.
  • Now it only installs the core content that is required to run Revit - templates and sample files.
  • Additional content can be added to the install process, but only for select countries:
    • US Base Families
    • UK Base Families
    • German Base Families
  • Additional content can also be installed later - using the 'Get Autodesk Content' command on the 'Insert' menu.


Install Settings

After choosing British English as the language (and it knows my location as Australia), you might expect the installer to know what content you might be interested in - but no, the default is for US Base Families.

  • NB. Make sure you don't miss the settings for Revit itself - the tiny drop-down arrow below the checkbox for Autodesk Revit 2021 - I did forget it this year, despite writing it up previously.
    • This should allow you to uncheck the MEP Fabrication options - assuming that you don't want them.

  • After changing the additional content from US to UK Base Families, the required space drops from 8.05Gb to 7.05Gb.  That makes you wonder what the rest of the world is missing out on relative to the extra 1Gb in the US supplied base families.

  • By default the Medium and Advanced materials libraries check-boxes are ticked.

  • The installer automatically picks up your country from the computer settings.

  • Once you start installing you get the usual pretty pictures that have less relevance to Revit with each passing year.

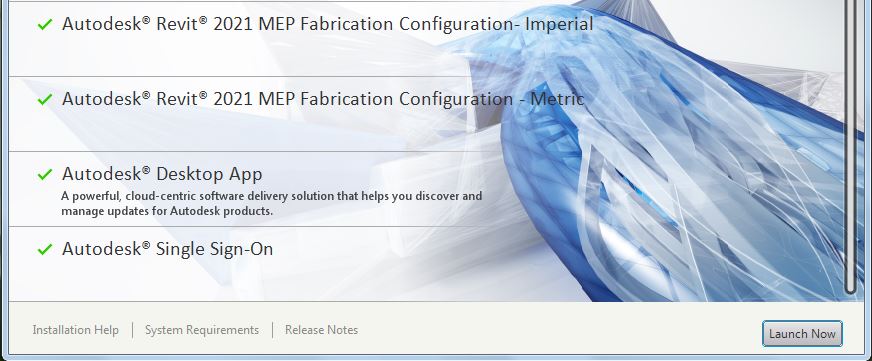
  • On completion, Revit tells you what it installed

  • This includes the things that you did not want it to install:

  • The next step is to remove those items that you don't want
    • A few years back Autodesk Desktop App was not working properly, so I always remove it - not sure if it works consistently now, but I always want to install updates in my own time, not as soon as they are released.  Remember the Revit 2020.2 "Internal Origin Debacle"!
    • As a BIM Manager you will want to control if and when point releases are installed - so you absolutely do not want users to click on yes to upgrades when they get prompted.

  • Having accidentally installed MEP Fabrication Imperial and Metric they do show up in the Programs list as separate elements, although only listed as 'content', with no mention of Fabrication - however, this may not be such a big deal as the files are small, so I only removed the Imperial content.

Space Junk

After installation there will be a huge amount of Autodesk "space junk" on your hard disk.  Most of this can be removed but this will be entirely at your own risk - it is advisable to make sure you have backups somewhere in case the files turn out to be required.

The install consumed over twice the 7.05Gb that it told me was required.


Here are some of the files that I found, which looked superfluous to me:

Steel Connections

  • Multiple Country folders

  • Removing all the except the country I chose saved 700 Mb

Templates

  • All those country templates cause 1.45Gb of bloat

  • The various discipline project templates may or may not be required depending on your company

  • Family templates are also bloated with countries other than those required

  • A quick tidy up removes 130 Mb of family templates


  • Install temp files were not automatically removed - all 2.7 Gb of them
  • There are also 110+ Mb of install log files, but I would not recommend removing those

Sample Files

  • Do we really need all these sample files to be installed in the Program Files directory?  All 571 Mb of them?  The largest 5 of them are 450 Mb worth of stuff I have never used - and those exist in each version of Revit that you have installed.
  • NB. I would recommend leaving at least the basic ones for your chosen discipline(s).

Country Code

This starts getting risky as you might accidentally delete something vital, but in the Program Files Revit 2021 folder there are another 420Mb of country-specific folders full of dlls


There is probably more space junk in there that you could remove, but it all takes time so I think I've reached the law of diminishing returns point - until the next time I want to install some Autodesk software!  Then I will need vast amounts of spare disk space again.

I don't think the writers of the installation software have any conception of the real world out there - they don't understand that taking the easy option for them is really annoying for end-users and BIM Managers.  It also wastes a huge amount of time for those of us who don't have endless disk capacity and actually want to minimise the amount of junk on our computers.

Next time - some of the interesting new features of Revit 2021 . . .  . .


Sunday, 22 December 2019

Revit 2020 Install Postscript

I recently tried to install the latest SP2 update to Revit 2020, and had some difficulties:


The dialogue box above did not give sufficient information about which file it could not modify - but it is apparently part of the unpacked install files.
The problem was nothing to do with Administrator privileges.


The advice I received from Autodesk was to do a full uninstall of Revit 2020, and then reinstall.  It turns out that may not have been necessary - but it did eventually work . . . .

Hard Disk Space

My computer has a solid state drive (SSD), which used to be very expensive, hence it is only 200Gb.  That means that disk space is valuable - not an uncommon situation.  This is apparently of no significance to Microsoft or Autodesk - every version of their software consumes more and more disk space.  200Gb gets eaten up very fast by their software, but also by their upgrade/install process.

Space Junk

Each time that Windows has an upgrade, it often demands at least 10 or 20Gb.  Autodesk is not much better.  What this means is that I frequently need to remove junk files that have been installed or are part of the installer software.

  • The Revit 2020 download is 12.2Gb
  • When unpacked it expands to 15.7Gb
The unpacked software has many files for various different languages.  Having chosen English as my install language, I assumed that the installer would have no use for any of the other languages.  Wrong!
I like to keep a copy of the unpacked installer file on the disk, in case I need to fix or reinstall.  In order to minimise the "Space Junk" I often remove all the other language folders from the installer (but I keep a full copy elsewhere, just in case).

During the reinstall process that I had to go through recently, I discovered that Revit actually does need some of those different language files - it will not proceed until you put them back into the install folders.

  • It needs some dll files from every single language folder
German dll files missing (and all the 13 other languages)

  • It needs every single rfa Steel Connection family template  from every single language folder
Czech Steel Connection Family Templates missing

  •  It needs all of the Sample files, even if you choose not to install any content.

371Mb of sample files

  • There are 761Mb of Steel Connection family template files in your installer.  If you delete any of them, any future re-install will fail.
761 Mb of Advanced Steel Connection Family Templates

Installed Files

  • There's 1.37Gb of steel connection files installed, whether you want it or not.
1.37Gb of Advanced Steel Connection Files


During the install process you can stop Revit from including MEP Fabrication - but you have to actively search for the settings and disable them (Default is to install).  It seems that you cannot stop it from installing Advanced Steel - and if you try (like I did), your install will fail.

What this means is that you have all those unwanted 14 language files and MEP/Advanced Steel files in your installer (several Gb);  And then you get exactly the same files installed in C:\ProgramData\...   its  "Double Space Junk"

If you ask me, this is very sloppy programming from the people handling the install software.  I believe that this is outside the control of the Revit team - but it sure as hell makes life difficult for the end-users.  If one person at Autodesk had written some more careful code that checks your chosen install language, and only uses that language to install the relevant files - just think how much disk space would be made available around the world.

All the hard work by the Revit programmers trying to speed up Revit is being undermined by the Installer team who are slowing down your computers.

As it is, we all need to spend time removing unwanted files.  Or we have to buy more hard disk space - not so easy if you have to retrofit a laptop with SSD.

If you need 700Mb space in a hurry, and you don't use 'Revit Steel Connections', look right here:
C:\ProgramData\Autodesk\Revit Steel Connections 2020
Remove all the languages except your own (which will be about half of the whole lot)

(NB. Be careful! and make sure you have a backup somewhere before you start removing Space Junk - its at your own risk).

Edit:  If you don't want all these different language files to be installed, please vote for Dave Plumb's Revit Wish over on the Autodesk Revit Ideas website:
Stop Installing Other Languages

Monday, 9 December 2019

Internal Origin Visible in All Views in Revit 2020.2

For anyone thinking of upgrading to Revit 2020.2, here is some advice to avoid a bit of pain in the upgrade process:


Autodesk have introduced a new feature in the point release Revit 2020 SP2 that should really require a database change (but does not do so):


Expose internal point of origin

This is a marker that indicates the true origin of the project (internal coordinates 0,0,0), which may be different to the 'Project Base Point' if that has been moved.


It is indicated by a 2 or 3 axis  X,Y,Z symbol in red, green and blue


  • The symbol cannot be selected;
  • It will cause you problems during 'Zoom to Fit' if it is outside your building;
  • It also shows up outside your view crop boundary - more Zoom issues and irritation;
 
  • It can be hidden/shown in Visibility Graphics, as a subcategory of Site.


This is a useful feature, as we sometimes need to find out where that point is - however, it will initially add confusion to anyone who does not already understand the coordinate system in Revit (as there will now be a third origin point to deal with).  

The real problem with it is 'Visibility' and in the upgrade process that you make to get to 2020.2:

Upgrade Process


  • If you upgrade from Revit 2018 (or 2019) directly to 2020.2, the internal origin will be OFF by default in all views (which is good).

  • If you upgrade the project to 2020 or 2020.1 then subsequently open it in v2020.2, the internal origin will be ON in all views - this is a total pain. Even though it won't plot, it is annoying. 
  • Even worse - it will be visible in all newly created views, including 3D Iso and perspectives.
The reasons for this:
  • The upgrade process from 2018/2019 to 2020 (or 2020.1) does not know about the new feature so it does nothing to prepare for it.  
  • There is no upgrade process from 2020.1 to 2020.2, so the software cannot do anything to the files and view settings. 
  • The upgrade process from 2018/2019 to 2020.2 does have a component built in that hides the new subcategory in all views.
Autodesk really should have put this new feature in a major annual release, and not in a point release, as it will create a lot of extra work for users.

Advice

So, my advice is to go straight from v2018 or v2019 to 2020.2 - then you won't have an issue.
i.e. make sure you have SP2 installed on all 2020 computers before upgrading any projects to any version of 2020.

Interestingly, I created a new project in 2020.2 from the Autodesk supplied 2020 (Aus) project template and the internal project base points are OFF in all views.  I was not expecting that to happen as the template was pre-2020.2.  There must be something in the software that deals with this issue when creating new projects?

Too Late

If it is too late, and you already have some projects in 2020 or 2020.1, then you need to turn off the subcategory in all those views . . . . .
  • It is not so bad in View Templates, but its annoying
  • Individual views is a total pain - see below for automation
  • Create view templates that will hide the subcategory in all NEW views (especially 3D);  edit the Type properties of any 3D view and set the view template to be applied as a one off to all new 3D views.


Automation

One option is to track down some code to hide the new subcategory in all views - either Dynamo or an API.

There is also an issue with the paper clip being removed from the Project Base Point symbol. 
For more information on this, refer to Revit OpEd Blog

Steve Stafford of Op Ed has also tracked down various Dynamo options for turning off the internal origin:

NB. I have not tested any of these Dynamo scripts, but others have (with comments):
OpEd Dynamo Graph
OpEd Dynamo Redux
Follow Up with a later Dynamo script

Autodesk really ought to fix this properly, but it seems that it is not possible for them to put anything into a point release, as that does not actually upgrade the project files.  And if it did, what would happen when you opened an upgraded file in 2020 or 2020.1?

[Edit.  John Pierson of Parallax Team has very generously given us a free tool for hiding all those pesky internal origin symbols in a project in 2020.2.  Its on the Autodesk App Store:
Internal Origin Hide-ifier

Thanks John for picking up after  Adsk's dog! ]

Friday, 23 August 2019

Dynamo Version in Revit 2020.1

Autodesk have just released Revit 2020.1, which is great news for MEP Revit users.  For the rest of us there are a few goodies (to be dealt with in another post), but there are implications for which version of Dynamo you are using:

As of Revit 2020, you (BIM Manager) don't get to decide which Dynamo version to use in that software, as it comes packaged in the Revit install, and subsequent upgrades.  However, in the real world, we are all still using and supporting Revit 2019, 2018, 2017 and if you are unlucky, 2016 & 2015 . . .

The compatibility between different Revit versions and Dynamo versions is quite complex.  Refer to my previous Revit 2020 Dynamo Version posts on this matter.
You can also refer to John Pierson's Sixty Second Revit matrix of compatibility

Installing Revit 2020.1

I have just installed Revit 2020.1.  It now automatically includes Dynamo 2.2.1

Logically you would want to have this same Dynamo 2.2.1 version installed in Revit 2017, 2018, 2019, 2020.

I would have assumed that the moment Dynamo is updated in Revit 2020, it would also be available to install in all previous Revit versions that support it?  In fact you would expect the dynamo version to be available well before it is pushed out in the latest Revit 2020 service pack/upgrade?

Well, is it?

I'm not entirely sure?

If you go to the Dynamo BIM downloads site, it lists all the versions available

Yes, it lists 2.2.1 - but hang on, that is only the 'DynamoCoreRuntime' version, not the full install, which only seems to be 2.0.3 (which is many months old).  My understanding is that the Core install is  only available for Sandbox (ie. Geeks, not average Revit/Dynamo users), which runs outside the Revit environment - so we can't install that in Revit?

Refer to Dynamo Core 2.2 Release
or A new way to get Dynamo Sandbox, which explains what it is:
         What is Dynamo Sandbox?     "Dynamo Sandbox is for package developers and other folks working with Dynamo code who want to stay up to date with the latest and greatest stuff coming out. Sandbox is Dynamo’s “Core” functionality distributed in a way that doesn’t interfere with other Dynamo installations and doesn’t require any other applications (except for a few windows components and some optional extras)."


So, how do we keep all our versions of Revit running with the same version of Dynamo?  Can someone at Autodesk help to explain this, please?

Could the Dynamo folks please have an explanation on the downloads site?  And maybe separate the Sandbox stuff?


Other New Features in Revit 2020.1 include:

Tuesday, 16 April 2019

Revit 2020 and Dynamo versions

I recently installed Revit 2020, and the incorporated Dynamo install has changed significantly to previous years.

Well, it seems to have installed Dynamo 2.1 with Revit 2020, and I am please to report that it left earlier versions well alone.  I had Dynamo 1.3.3 installed in Revit 2017, 2018 & 2019 - and all of those appeared to be intact.  There is some more information on this here.

 New Feature:  Integrated Dynamo Revit 2.1 into Revit 2020

On the Autodesk Blog and Youtube channel are a whole bunch of videos about new features - this included one about Dynamo, entitled "Integrated Dynamo Revit 2.1 into the Revit 2020 release".

As of  15 April (USA) or 16 April (Australia), the video has been removed - I believe that is because its description about supporting Dynamo across multiple versions of Revit is a little confusing.

What the original Autodesk release Video  said is:
  • "You will not be able to update or use a different version of Dynamo with Revit 2020."
  • "This will greatly simplify the installation process and versioning for Dynamo Users."
  • "With this unified experience, you will have Dynamo 2.1 installed at launch and this is tied to Revit."
  • "As the product team release updates for Revit, this is the only way Dynamo will receive updates."
  • "Running any version of Dynamo other than 2.1 will be unsupported moving forward." 
  • "One version of Dynamo will not be supported across multiple versions of Revit."
The last two item are the contentious and confusing ones, and hopefully will be clarified in the near future.  The implication was that you would have to upgrade all of your graphs to Dynamo 2.1 to run under Revit 2020 - hopefully this is not the case.

Whatever the outcome, this is a big change to how Dynamo upgrades are managed.  In the past it was very difficult for users to manage the different versions on different Revit versions - let us hope that this will greatly simplify the process in the future.  I think this will be a really good improvement to the install/upgrade process for Dynamo.

Dynamo / Revit Version Compatibility

No doubt we will still have an overlap period of a few years while we switch to the new system, where we need to keep an eye on which Dynamo version is supported by which Revit.

John Pierson has created a very useful chart to keep track of this, over on his Sixty Second Revit blog.

It appears that any Dynamo graphs created in version 2.02 should still run under Dynamo 2.1 (in Revit 2020).  Anything created in Dynamo 2.1 might work in earlier 2.xx versions, but no guarantee - apparently graphs created in 2.1 do open in 2.02 (Revit 2017, 18,19), albeit with a few minor glitches  see this forum thread.

What it may mean is:
  • If your office still supports Revit 2016, you'd need to maintain Dynamo 1.3.2 versions of graphs.
  • For any Revit versions from 2017 - 2019, these should still work (with the same Dynamo version, or 1.33 or 1.34)
  • If you are lucky enough to be supporting only Revit 2017 and later, you have a choice of Dynamo 1.3.4  or Dynamo 2.02 (or later when available)
  • We don't yet know what the last version of Dynamo will be able to run in Revit 2017.
  • At some point you will need to move from Dynamo 1.3.4 to 2.xx - if you are thinking of rolling out Revit 2020, now is a good time to make that change.
  • Once you have all your Revit versions running with Dynamo 2.xx installed, life should be easier - as you may only need to maintain one version of your graphs (TBC), even if the versions of Dynamo are slightly different. 
  • It might be wise to develop the graphs in the older Revit version that you are using - say 2018, then they are more likely to be forward compatible than being backward compatible if you developed them in Revit 2020/Dynamo 2.1.
  • All that . . .Until Dynamo 3.xx is released, when the fun starts again - but by that stage, Autodesk should be handling the issue for us!

Stop Press - Revit 2016

I have just heard some news that Autodesk subscription licences on networks will stop supporting Revit 2016 within the next month - ie. Revit 2016 will stop working on floating licences, even if you do not upgrade to Revit 2020.  This needs to be confirmed, but if it is true, then Dynamo support on Revit 2016 becomes immaterial!

Friday, 20 April 2018

Dynamo and Revit 2016 vs 2019

When I installed Revit 2019 recently, I uncovered a problem that will undoubtedly affect some other people - in fact there is already some buzz about this issue on the forums:


Dynamo Versions

The latest versions of Dynamo do not support Revit 2016. 
Refer to DynamoBIM blog


The theory behind this is that the Autodesk Dynamo team are working to a system whereby only three consecutive annual releases need to be supported by any version (2016, 2017, 2018  or 2017, 2018, 2019).  Typically Autodesk Revit licenses are set up that way, to only allow 3 years - but its only a license issue, not an inbuilt Revit limitation.  However, Autodesk realise that in the real world it is very difficult to manage a Revit installation in a company where you have multiple projects that need to be on different Revit versions to match up with varied consultants on each project.  Supporting 4 versions of Revit simultaneously is quite common in the industry - and Autodesk will supply licenses for this accordingly if you ask them (or your reseller).

There are two new Dynamo versions available:
  • Dynamo 1.3.3   which is virtually the same as 1.3.2, except in the versions it supports
    Dynamo 1.3.2 supports Revit 2016, 2017 & 2018 (but not 2019)
    Dynamo 1.3.3 supports Revit 2017, 2018 & 2019
  • Dynamo 2.0 is a whole new 'Major Release' - it is not backward-compatible with previous versions (dyn and dyf files are saved in a new format)
    Dynamo 2.0 supports Revit 2017, 2018 & 2019
That means there is no one version that supports both 2016 and 2019 - not even a brief overlap in time while you are updating graphs, custom nodes & packages.

Dynamo 2.0 graphs and custom nodes cannot be opened in 1.xx versions.  Some or most Dynamo 1.xx graphs and nodes will work in Dynamo 2.0 but there is no guarantee - see DynamoBIM Blog 2.0 and Beyond for more detail. 

It is possible to have two parallel installations of Dynamo 1.3.2 (or earlier) and 2.0 - both of which would run on Revit 2017 & 2018 (you get a choice of which to run when you start Dynamo) - but only one of those two versions would run on either Revit 2016 or 2019 (unless you have 1.3.3 and 2.0 which could both run on 2019).

I don't think that you can have both 1.3.2 and 1.3.3 running in parallel like this - I have not tried it, but that is the word I see on forums.  I believe that one install messes up the other - and you can't choose which versions of Revit to install Dynamo to.

 If you do want to have two versions of Dynamo installed (one being 2.0), you will need to maintain two versions of all your graphs, custom nodes and packages.  And don't get them mixed up!

If you have any projects still in v2016, you will need to consider very carefully how you handle your Dynamo versions.  I would personally recommend that you hold off Dynamo 2.0 until you are quite certain you won't ever need to do anything in Dynamo in Revit 2016 - once you make that leap to 2.0 there is no going back.

It would be really helpful for us if Autodesk were to give us a version of Dynamo (1.xx) that is just like 1.3.3 but supports Revit 2016 too (ie. 4 consecutive Revit versions).  I believe there is no technical reason why not - its just a decision making process at Autodesk.  That would help us get over this tricky version management situation until things have moved on a bit - then we can all stop using Revit 2016 and the Dynamo 1.xx series, in our own good time, and move on to 2.xx series Dynamo.  Happy ever after.  Until the next major release, that is!

Dynamo & Revit 2019 Install

Last year the Revit 2018 installation automatically installed quite a several month old version of Dynamo - which caused all kinds of issues for people who already had newer versions.   For 2019, Autodesk have gone to the opposite extreme: the latest build of Dynamo was automatically installed:  1.3.3 with Revit 2019.  But of course it automatically removes old versions of Dynamo in the process - without any warning whatsoever.

When I fired up Revit 2016 after installing 2019, I could not find Dynamo.  The Revit 2019/Dynamo 1.3.3 installer had uninstalled it completely from 2016.

Prevention is Better Than Cure - a Dodgy 2016 Workaround

If you still need 2016, you should protect your older Dynamo install for Revit 2016 before you do the Revit 2019 install.  I tried this rather dodgy workaround - from what I read on the DynamoBIM forums:

Make copies of these files (assuming Dynamo 1.2 but just substitute 1.3.2 if that is your version):
  • Dynamo.addin file in the C:\ProgramData\Autodesk\Revit\Addins\2016 folder
  • These two folders:
    C:Program Files\Dynamo\Dynamo Core\1.2
    C:Program Files\Dynamo\Dynamo Revit\1.2\Revit_2016
Then replace those files where they were before the 2019 install stripped them out.  Of course it means that the uninstaller won't work for that version of Dynamo, so you'll have to remember to remove them manually later.

In my case, it was too late - I had already installed Revit 2019, so I found a Dynamo 1.2 installation on another computer and copied those files to the computer where they had gone missing - to my surprise it actually worked.

Warning:  be very careful messing around with deleting/copying files and folders in your Program Files directory - do this at your own risk.

Tuesday, 17 April 2018

Revit 2019 Installation

Notes on  installing Revit 2019:

I learnt a couple of versions ago that it is vastly better to change your install options for Revit to one of the two 'Download' methods, instead of the default 'Install Now'.   This gives you so much better control.  In fact you can change your Autodesk profile settings to default to Download instead of Install Now.  Despite this, the 'Content' is not included in that, and still gets downloaded during the install - but once you have the content from your first install you can uncheck that option for any future installs.

Once you have downloaded the software, you can run the install from your own network or C drive when it suits you, not as part of the initial download process.

The Install

The Autodesk install Help Files section on 'Changes to Installation' states the following:

If you are responsible for installing or upgrading the Revit or Revit LT software to a new release, learn about recent changes to the installation process.

  • Advanced material library: In addition to the standard material library, an advanced material library installs with Revit. This library provides new appearance assets that use physically-based definitions, optimised for use with the Autodesk rendering engine.
  • Microsoft® Windows® 10 must support .NET Framework 4.7: Older versions of the Microsoft Windows 10 operating system (Version 1507/Build 10240 and Version 1511/Build 10586) do not support .NET Framework 4.7, which is required for Revit 2019 and Revit LT 2019. Before installing the software on a computer that uses one of these versions of Windows 10, upgrade to a newer version of the operating system. 

Advance Materials Library

This is one of the new features of Revit 2019 - you may not use it yet, but it is sensible to install it anyway.  The default setting is to install it, but with no explanation of what or why - see the Autodesk help files for an explanation of 'Physically based appearance Assets'.

Windows 7

I guess that means that Autodesk does not support Windows 7.  Many large companies have not yet switched to Windows 10 (thankfully - I am not a fan at all, for many reasons, not to be discussed here) - but it should not be a problem.  We hope!
 .NET Framework 4.7  was released for Windows 7 SP1 and Windows 10 in May 2017, so if you have updated your copy of Windows 7 since that date, you should be OK?


Install Settings

The first thing to do (after confirming the install language, which apparently I could not change), is to configure the install settings - particularly the first section below 'Autodesk Revit 2019'

Discipline

The word 'Discipline' has many meanings in the English language.  There are two relevant meanings here:
1.  Which sector(s) of the construction industry do you work in?  The default setting is 'All'.  As an architect, I'd like to be more specific, so that I only install stuff relevant to me, so I choose 'Architectural'.  Therefore I am not remotely interested in MEP Fabrication.  A structural engineer might feel the same way, as might a landscape architect or urban designer, or interior designer (oops, they don't even get an option here).  For the third year running, MEP Fabrication has two install options - metric and imperial - both are ticked by default, which means that I have to be on my toes and manually untick the options (unless I happen to be an architect who designs/fabricates duct or pipe installations in both the USA and almost any other country you care to name).

2.  Discipline can also mean adherence to defined standards and procedures; or following through to make sure that your work is neat and tidy, and does not adversely affect others.  When I choose a construction industry discipline, I do not expect to have to manually follow through to prevent getting redundant stuff installed on my computer.   Who knows what else is being installed that I don't want?  Clearly whoever has been managing the installation software at Autodesk for the last three years does not understand the second meaning of discipline.  Perhaps they need to be administered a severe dose of the third meaning of discipline (which I won't elaborate on here!).

Talking of 'Neat and Tidy' I like my local files to go somewhere other than 'My Documents' - so this is a good chance to set that rather than messing about with Revit.ini files.


Content

By default, you should get your own country content.  We used to get a choice but now the installer is obviously burrowing into your computer to figure it out for you.  However, you can change that.  In fact you can choose more than one set of content.  Last time I did that, I found an amazing wealth of component libraries in some other country contents - but you need a lot of time to sort through that stuff, so I would only recommend doing it once during your BIM manager career!


Shared Components

Shared with other Autodesk products like Inventor & 3DS Max, I guess?  The 'Medium Image Library' now has an advanced version for 'Physically based appearance Assets', which is a new feature in Revit 2019.

Pretty Pictures

Autodesk obviously expect us to sit and watch the install process so they have kindly provided a series of pretty pictures of things that bear almost no relevance to the construction industry, with only one exception - you figure it out.  None of them could possibly have been created in Revit, that is for sure.  Yes, I know that this part of the installer is not controlled by the Revit team, but it says something about Autodesk as a company.


Autodesk Desktop App


This pretty picture is a special treat - because it happened to pop up while installing a piece of software that I absolutely do not want, and was not given a choice about!  Autodesk Desktop App.

Autodesk describes it as: "A powerful cloud-centric software delivery solution that helps you discover and manage updates for Autodesk products".  That says it all as far as I'm concerned - "Out damned software".  In the last few years the general consensus has been that it doesn't work well, so I shall leave it to others to test it out, while I remove it.  I find that social media is a more reliable way to find out about Autodesk updates anyway.  As a BIM Manager in a multi-license office you almost certainly don't want this software on all computers, as you'll want to control when updates are pushed out rather than allowing a free for all in the office.


Installation Complete

On completion, all the things I selected were successfully installed, along with one item I did not select (as described above).

Launch Now

 I clicked on the 'Launch Now' button, and it asked me to select a license type (fair enough), then prompted me to log in.  Why?  I don't want to log in when I start up Revit - not unless I'm using BIM360 or whatever it is now called (it will most likely be renamed by the time you read this).   So I cancelled the log in and launched it from the desktop icon.  No log in prompt this time, thank goodness - just the license dialog.  Activation went smoothly, using my license number & key.

Dynamo - Warning

Unlike the Revit 2018 installation, the latest build of Dynamo was automatically installed:  1.3.3
Refer to DynamoBIM blog

Be warned:  this version of Dynamo will not work with Revit 2016.  When I fired up Revit 2016, I could not find Dynamo.  Could the Revit 2019/Dynamo 1.3.3 installer have uninstalled it automatically?  Yes, it could, and it did.

If you still need 2016, you need to protect your older Dynamo install for Revit 2016 before you do the Revit 2019 install.  I tried this rather dodgy workaround - from what I read on the DynamoBIM forums:
Make copies of the relevant files - I think it needs to be these files (assuming Dynamo 1.2):
  • Dynamo.addin file in the C:\ProgramData\Autodesk\Revit\Addins\2016 folder
  • These two folders:
    C:Program Files\Dynamo\Dynamo Core\1.2
    C:Program Files\Dynamo\Dynamo Revit\1.2\Revit_2016
Then replace those files after the 2019 install has stripped them out.  Of course it means that the uninstaller won't work for that version of Dynamo, so you'll have to remember to remove them manually later.

Just to make your life even more complicated, Dynamo 1.3.2 does not support Revit 2019.  That means there is no version that supports both 2016 and 2019 - not even a brief overlap while you are updating packages and code.  So if you are still running Revit 2016, don't even think of installing Revit 2019 until all your projects are upgraded to some intermediate version - or you go straight to 2019 and spend 24 hours fixing all your Dynamo stuff!  That doesn't sound like a recipe for a peaceful life to me.

Addins

It looks like we have the same Addins automatically installed as in v2018:
  • Batch Print
  • eTransmit
  • Model Review
  • Worksharing Monitor
  • Dynamo
  • Formit Converter (Optional)

Summary

All in all, this was a relatively painless installation process now that I know the tricks and pitfalls (apart from Dynamo pain).  It did not vary greatly compared to the 2018 install, which is nice for once.