BILT Speaker

BILT Speaker
RevitCat - Revit Consultant

Saturday 25 February 2017

Gare do Oriente - Revit Nested Repeaters - part 3

In previous posts I described how to use Revit adaptive components and repeaters to start creating a model of Santiago Calatrava's roof structure of the Gare do Oriente in Lisbon:
Part 1 - The rig for one structural column
Part 2 - Placing roof panels onto the rig

This time we will look at creating the structural elements to put on the rig.


Here is a youtube tutorial on creating the structural elements as an adaptive component, and placing the adaptive components to become a 'Repeater'

Steps

Here is a quick checklist of steps required:
  • Start new adaptive family
  • Place a point at the origin, plus two more points
  • Make the points adaptive
  • Join all three points with reference lines, ensuring that 3D snapping is ON
Add an arc between points 1 and 3;  the arc must be kept planar with the 3 points, so it needs to be hosted to a rig (or alternatively a plane - not shown here)
  • Place a hosted point midway along the line between points 1 and 3
  • Place a reference line from that hosted point to adaptive point 2
  • Place another hosted point on that new line
  • Place a reference arc by Start-End-Radius, snapping to adaptive points 1, 3 and then to the latest hosted point
Create a curved swept blend along the arc:
  • Place two more hosted points close to each end of the arc
 
  • Create a new profile family from a generic adaptive template (not a traditional profile family template)
  • It does not require an adaptive point
  • Draw a 2D profile closed shape on the level work plane - in this example a T-shape
  • Dimension it and make it parametric
 
  • Save and load into the first adaptive family
  • Place a profile component onto each of the hosted points on the arc
  • NB. The reason for hosting the profiles onto points that are themselves hosted on the arc is that it gives much better control:  The points have rotation parameters as well as parameters to control their distance along the arc - required to vary depending on the structural connections. Hosting the profiles directly on the arc would not give those controls.
  • Duplicate the type of the profile component closest to adaptive point 1
  • Make its dimensions larger
  • Select both profiles plus the reference arc 
  • Create form
  • It will generate a swept blend that tapers to a smaller size towards point 3 
  • NB. For more detail on this procedure, refer to my post on Adaptive swept blends
Create a simple extrusion family
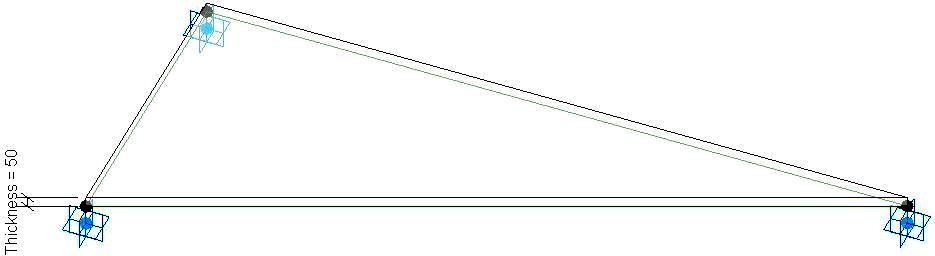
  • Create a new family from a generic adaptive template
  • Place two points (one at the origin)
  • Make them adaptive
  • Place a reference line between the points 
  • Host two points close to each end
  • Associate their 'Segment or Chord Length' properties to parameters for offsets from ends
  • Make the reference planes of the points always visible
  • Set the Work Plane as the reference plane of one hosted point
  • Draw a profile for the extrusion - I just made it a simple circle
  • Give it dimensions and associate to parameters
  • Repeat the same profile on the other hosted point
  • Select both profiles and the reference line
  • Create Form
  • Save the family - I like to use a code to indicate it is adaptive and how many placement points
    eg:  AC 2pt Tube
  • load it into the first adaptive family
  • Place one of the new extrusion components between adaptive points 2 and 3
  • Associate its properties to parameters in the parent family as desired
  • Flex the adaptive points to check it is all working

 This structure now requires an additional placement point in a different plane to the rest
  • Add another point close to point 3
  • Make it adaptive (4)
  • Move it down in the Z direction
  • Link points 2 and 4 with a reference line (optional)
  • Link points 3 and 4 with a reference line (optional)
  • Place one of the tubular 2 point adaptive components between points 2 and 4 
  • Place another between points 3 and 4 
  • The structure family is now ready to use
  • Save it and load it into the rig family created in part 1 - The rig for one structural column

Assembling the structure on the Rig

  • On the rig, add a new hosted point onto the vertical reference line - this represents the springing point of the structure where it starts to curve out
  • Below this will be a rectangular extrusion, to be added later
  • This point will host the base of the structure adaptive components
  • Change its Measurement Type property to segment or chord length
  • Associate its segment/chord length to a parameter for Height of springing point
 
  • If you have the roof panels already in place on the rig (Step 2), it will probably be easier if you temporarily hide them before starting, to make snapping easier.
  • Place one of the support adaptive components, making sure to snap the 4 placement points onto the rig in the right order:
    1. Springing point
    2. Central valley hosted point on vertical line
    3. Divided path point on inner circle (orthogonally, along X axis from origin)
    4. Divided path point on outer circle, one division around anti-clockwise
Array a pattern around the circle using the Revit Repeater function:
  • If you select just the one structural element and repeat it, you get a straightforward radial pattern - this is not what we want (so, undo it)
 
  • We need to teach Revit how the array pattern should go - so you have to place a second structural component:
  •  Place another adaptive component 90 degrees around the circle in the same sequence
  • The first two placement points go onto hosted points that are already occupied by the first structural component - so it is vital that you snap to the host points, and not to end points or adaptive points on the component.
  • Watch the prompt in the bottom left corner of the screen before each point placement - the first two should be to Point of Reference points
  •  The second two should be onto Point of Divided path
  • Use this technique for every subsequent placement of adaptive points - it gets progressively more tricky as you go
  • Select the two adaptive structural components
  • Click on the Repeater icon
  • You should get the desired pattern if all adaptive points were hosted correctly.  
  • If not you may be able to rehost the points (if you can guess which one is wrong!) - or just delete the adaptive component and place it again
  • The next step is to place two more structural components in the reverse direction (clockwise)
  • You could try placing them to the correct hosts, but it is really difficult with all those elements in the way - so it is easier to temporarily hide the repeater first
  • You may find that when you hide the repeater, the nested tubular components around the top do not hide.  In which case, you need to select one, then right-click to select all instances and hide those too
  • Once placed, the two new structural components will fit in the gaps between the first repeater element
  • Some of the structural members will be in the same place as the original ones, so you may get a warning message about identical instances.  
  • If this is an issue (for scheduling etc), then you will need to go back into the adaptive structural component and give the common elements a visibility instance parameter - back in the rig family, you can then switch off the duplicate structural members on the two newly placed components.
  • Select the two new components and array them using the Repeat function
  • Now the basic structure should be complete

  • Try flexing the parameters for the rig dimensions to check that the structure moves with it.
  • If you have the roof panels already placed, make them visible again to check that it aligns correctly


Click below to proceed onwards:
Step 4  Adding Struts to the structure
Part 5 - Assembling the Array of Structural Columns

Wednesday 15 February 2017

Tracking Which Area Scheme a Schedule Belongs to in Revit

Typical project browser names
Have you ever opened a Revit project and tried to understand the naming conventions (or lack thereof) for Area Schedules?  And then tried to figure out which Area Schedule belongs to which Area Scheme?  It can be tricky, particularly with names like the ones above, which people seem to like using.

When you create a new Area Schedule, it puts the Area Scheme in brackets at the end of the schedule name.  Many people rename it and remove that suffix because it shows up on the sheet, or they just don't realise how important it is for identifying the Area Scheme it belongs to.

Unless people leave the Area Scheme in the schedule name it is difficult to keep track of which is which - the only trick that I know is to use the 'Highlight in Model' function, which sometimes works:
To use this, first select an element in a particular area schedule, then click on the 'Highlight' icon.  If you happen to have an area plan view open that shows the area element then Revit will go to that view and select the Area.  You then need to deselect the Area to get to the View Properties for that view (or use the drop-down menu just below the Type Selector).  It should show you the Area Scheme name in the Type Selector

If you don't have that view open, Revit may figure out which view to open but usually it asks to search for a suitable view, which may take some time - it is probably worth a try. 
 

However, you may actually not have a view of that particular level for that particular area scheme, so Revit won't find a view.   Or the area may be unplaced so it won't show on a view, in which case the Highlight function is greyed out.  

To really track down the area schemes for troublesome areas/schedules, you may need to create the missing views for every level for every area scheme - then try the Highlight in Model function again.

If anyone knows a better way, please let me know.

Area Schemes

Prevention is better than cure:
Area Scheme names and descriptions are things that people are often very casual about - and it soon gets very messy.  In many cases, people just leave the default description, which is pretty meaningless.
Badly named and described Area Schemes
The first step in solving this issue is to train people to not only name the Area Schemes sensibly, but to give them a proper description so that others have at least some clue what they are for

Slightly improved Area Scheme naming and descriptions
 OK, so the example above is not a serious system, but you get the idea, I hope.

Area Schemes in Schedule (Workaround)

Since it is not always feasible to keep the area scheme in the name of the schedule, here is a workaround that might help you out:

  • Whenever a new Area Schedule is created, add a calculated parameter
  • Call it 'Area Scheme' 
  • Make it a text calculation
  • For the formula, put the Area Scheme name in quotes
  • In the schedule it will display the Scheme name in every row, even for elements in linked files
 
  • You can hide this column, but it remains there so you can check the scheme name later on
Of course this method is not foolproof as someone could rename the Area Scheme at any time - but it should work in the majority of case.

If anyone knows a better way, please tell me.

[Edit] - As Dmitry Chubrik has pointed out in the comments, here is a good technique for changing the Area Schedule titles: 

Renaming Area Schedule Titles

As it is strongly advisable to keep the Area Scheme name in brackets within the schedule name, there is a way to do that without it showing up in the schedule title that appears on the sheet.  If you want change the title, do not rename the schedule in the Project Browser;  also, do not just edit the text in the schedule title cell, as this will rename the schedule too.
Instead, you should click in the schedule title cell, then click on the "Clear Cell" icon that appears in the ribbon - this literally removes all text from the title cell.  You can then type in new text, which will not have the effect of renaming the schedule in the Project Browser.

Once the link has been broken between schedule title and schedule name, the title can be changed just by editing the text in the title cell.

Using this method you can keep the Area Scheme name in the Project Browser for multiple schedules of the same Area Scheme - and keep track of which is which.  It would be good practice to teach all Revit users to do this as a matter of course.

Thanks for the tip, Dmitry

Wednesday 8 February 2017

Gare do Oriente - Nested Revit Repeaters - part 2


Following on from my previous post about modelling the roof of Santiago Calatrava's Gare do Oriente railway station roof, here is part 2:

Placing roof panels on the top of the supporting column

The process is described on a YouTube video, so I will only summarise steps below.
YouTube link here


1. Create an adaptive Roof Panel

  • Start a new Adaptive generic family
  • Place 3 points (anywhere)
  • Make them all adaptive
  • (Optional) If you want to raise the panel above the structure, host an additional point on each adaptive point;  move it up and associate its Offset to a parameter called Panel Offset
  • Join the three adaptive points (or offset points) with reference lines (making sure 3D snapping is on)
  • Select the reference lines
  • Create form; give the panel a thickness if desired
  • Associate the form's material to a parameter
  • Save the family with a name such as 'AC 3pt Roof Panel'.  I like to use a prefix code in the name to indicate it is adaptive (AC) and the number of placement points (3pt).

Place a Roof Panel

  • Load the roof panel family into the support rig family created in part 1
  • Place an adaptive roof panel component onto the rig:
  • First placement point, snap to the lowest hosted point on the vertical line of the rig
  • Second, snap to a point on the lower circle
  • Third, snap to a point on the upper circle, one point around from the lower circle snap (anticlockwise, depending on the point order in your panel)

Repeater

  • Try selecting the panel and turn it into a 'repeater'
  • The panel will be repeated around every point (8 times) - not the result we desire !

  • Undo the repeater - we have to 'teach' Revit how the pattern should be repeated:
  • Place a second panel in the same relative location but two points along the circle - it is very important that you place the points in exactly the same order as the first panel, making sure that you snap to the points on the rig, not on the panel that you have already placed.
  • Select both panels and repeat them
  • This time it should place a panel in every quadrant
  • To complete the other half, place a panel in one of the gaps
  • Then place another in the next gap - to establish the repeat pattern spacing
  • Select them both and 'Repeat'
  • Now we should get the correct pattern of two alternating repeaters of four panels each

The roof panels on top of the support rig are now complete - and should look square in plan, with valleys from the perimeter sloping in to the centre.  Flex any of the parameters in the rig and the panels should all move with it.

The next steps:
Step 3 - Creating the structural elements and placing on the rig
Step 4  Adding Struts to the structure
Step 5  Assembling the Array of Structural Columns
For more detail, refer to an earlier post I did on Adaptive swept blends

Wednesday 1 February 2017

Gare do Oriente - Nested Revit Repeaters - part 1

In 2013 I presented a paper titled "Fractal Fun with Revit Repeaters and Adaptive Components" at three RTC events in Auckland, Vancouver and at the inaugural European Revit conference in Delft, in the Netherlands.  Part of the presentation involved a live demonstration of how to construct a parametric Revit model of the roof of the Gare do Oriente railway station in Lisbon, designed by Santiago Calatrava.

Gare do Oriente by Santiago Calatrava

Since then I have had a number of people asking me how it was done - it was of course described in step-by-step detail in the RTC handouts.  Those are not so easily accessible now, so I am posting the content here, in stages.  Part 1 involves creating a rig for one of the structural supports of the roof.


I will not show a step-by-step guide here as the process is described in a video tutorial:
here is a youtube link


As a reminder, below is a list of the steps required in the process:

  • Start a new Adaptive Component
  • Place a point at the origin (X,Y,Z = 0)
  • Make it adaptive
  • Make its 'Show reference planes' property to 'Always' visible
  • Set the workplane as the horizontal reference plane of the adaptive point
  • Place another point on top of the adaptive point
  • Move it up in the Z direction
  • Associate its 'Offset' property to a parameter 'Height' (NB. it will only have an Offset property if it is correctly hosted on the horizontal reference plane of the adaptive point)
  • Draw a reference line from the top point down to the adaptive point, making sure 3D snapping is on (Options toolbar)
  • Place two more points, both hosted on the reference line
  • Make the upper line-hosted point always show reference planes
  • Change its Measurement Type to 'Chord Length' or 'Segment Length' (NB. because the host is a straight line, in this case Segment length is the same as chord length, which just means direct distance)
Hosted point Measurement Type
  • Associate its 'Chord length' to a parameter called 'Perimeter Drop'
  • Change the Measurement Type of the lower hosted point to 'Chord Length' or 'Segment Length'
  • Associate its 'Chord length' property to a parameter called 'Valley Drop'
  • Flex the parameters to test the rig thus far;  move the adaptive point to check everything else is hosted to it
Circles to host geometry
  • Set the workplane as the horizontal reference plane of the top point
  • Place a reference circle centred on the point
  • Make its temporary radius dimension into an actual dimension
  • Associate the radius dimension to a parameter called 'Radius outside'
  • Set the workplane as the reference plane of the upper hosted point
  • Place a reference circle centred on the point
  • Make its temporary radius dimension into an actual dimension
  • Associate the radius dimension to a parameter called 'Radius inside'
  • Create a formula for 'Radius outside' = Radius inside * 1.4142
Divide Path
  • Select the top circle
  • Click on the 'Divide Path' icon
  • Set the number of points to 8
  • Select the lower circle
  • Click on the 'Divide Path' icon
  • Set the number of points to 8
The basic rig is now complete, ready for adaptive components and repeaters to be hosted on it.  These will be covered in following tutorials.

Step 5  Assembling the Array of Structural Columns