BILT Speaker

BILT Speaker
RevitCat - Revit Consultant

Friday 26 June 2020

Analysis of Slanted Walls in Revit 2021

Any new modelling feature in Revit is welcome.  Although I have seldom needed to slant walls in a Revit model, it something that people occasionally want to do.  Now that you can easily slant walls in Revit 2021, we can expect to see a huge number of very scary looking buildings going up around the world (and hopefully not falling down).  Builders and structural engineers will probably be cursing Autodesk for years to come for this new feature!

For the first time in many years I did not do any beta testing of this "Shiny new feature" of Revit - so I do not yet know of its limitations or benefits.  I decided to do some very simple testing to see what the software engineers came up with.  Here are my preliminary findings:

Slanted Wall Angles

Once you place a wall in Revit 2021, it has a new property:
  • "Cross-Section" - this will be set to "Vertical"


Change the property to "Slanted" and it enables another new property:
  • Angle From Vertical
  • The angle will initially be set to zero

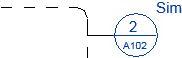
In a section view you can see the wall angle zero being vertical
  • In this example there is a room in section to the left of the wall
    • selected wall is purple
    • Room in section is pink
    • There is a vertical reference plane where they meet (green dashed line, not yet visible)
    • There are several detail lines (dashed) running from the base of the wall (inside face) up at 10, 30 and 45 degrees to vertical.

Wall Pivot

I was curious about the wall pivot point:
  • Set the angle to 30 degrees
    • Notice the edge of the room has moved back from the reference plane;
    • The wall pivot point is not the bottom left corner (inside face of the wall);
    • The inside face of the wall is not on the detail line.
  • On checking I realised that the wall 'Location Line' property was set to Wall Centerline
    • The wall is pivoting around its centreline base of wall
    • This is fair enough - but is a setting to watch out for
    • It becomes more obvious when the angle increases to 45

  • The wall thickness does not change but the horizontal dimension across its base line increases with the angle.


It is unlikely that you would want the wall centreline to be the rotation point as it is hard to predict where the inside face base will be from its original location (unless you resort to trigonometry).

To solve this:
  • Set the angle back to zero
  • Change the Location Line to 'Inside Face of Wall' (or Outside face if you want)

  • Change the angle and it will rotate around the inside face base of wall
    • Room edge stays on the original reference plane
    • Wall edge aligns with the slanted detail line

Change the angle again and it pivots as expected

So far, so good - even if a little tricky.
  • Behaves as expected, but is a trick for new players.

Base Offset

What happens when you change the base offset of the wall?
  • Try changing the base offset to 1 metre (1000mm)

  • Oops - the wall is still pivoting down at the level - not the base of the wall (ie. around where the wall base would be if it started down at the base constraint level).
    • That is very confusing

  • What happens if you combine a base offset and a wall centreline Location Line?
    • The end result will be almost unpredictable
    • The room extent is nowhere near the actual wall

I do not believe that this is the correct behaviour for the wall - I think it should pivot about the base offset height at whatever Location Line you have chosen.
  • This is really going to confuse people

[Edit - Plan Views added]

The diagrams above show what happens to the wall in section, so I have added a few snapshots of plan views to clarify (I hope) what to expect:
  • Vertical wall
  • Inside face of right hand wall on the reference plane
  • Right hand wall Slanted 45 degrees; Location Line Inside face; zero base offset
    • Note that base of wall has not moved (on the reference line):
  • Right hand wall Slanted 45 degrees; Location Line Wall Centreline; zero base offset
    • Note that the inside face of the base of the wall has moved slightly to left (in fact whole wall has moved) - due to pivot point being centre of wall):

  • Right hand wall Slanted 45 degrees; Location Line Inside Face; 700mm base offset
    • Base of wall moved 700mm to right
    • Apparent wall location is the same as the wall with zero base offset - but that is what happens at the cut plane height only (a notional drawing convention).  The important thing is that the base of the wall should not move when you slant the wall, but it does.


Conclusion:

Should I have done some beta testing and warned the software developers that this was not acceptable behaviour?

I have tried that with several new features in the past - sometimes they have modified things accordingly, but often not.  Often the beta testing process comes too late in the development cycle, and things like that cannot be changed before release.

Either way, I think it is wrong and should be fixed immediately - before people start using it on real projects.  Slanted walls will be scary enough without being built in completely the wrong location.

Next blog post I will be investigating slanted walls and room extents

And following that, 'Why the wall joins don't work in plan' . . . .


Friday 19 June 2020

Installing Revit 2021 - more Space Junk

Last year I did an analysis of how much space Revit takes up during the download and install process for the latest version (2020.

Here follows an update for some of the changes in v2021:

Download and Extraction

The download file size is much the same as last year 15.7Gb - all sorts of useless stuff along with the small amount that I actually need for Revit itself!

The download/extraction process still needs 45Gb+ of free space on your hard disk - a challenge for me with a SSD of only 208Gb.   I forgot to read my notes from last year - the extraction process failed again as it needed just a bit more than 29Gb I had free after the download (15.7 + 29 = 44.7Gb total free).

Installation

Having completed the extraction process (by double clicking on the first downloaded file), it gave me an error message saying that it could not proceed with the install.  Well, that was fortunate because I don't want it to go straight from Extraction to Install - I see those as separate processes anyway.

The first step is to move the 7 downloaded files to safe place - off your hard disk to free up 15.7 Gb.  It is curious that the extracted files are also 15.7Gb - why are the downloads not in a compressed format?


Once the install process starts, it seems the same as previous years but there are some subtle differences:
  • Content is not automatically installed.

Content

The release notes make no mention whatsoever about the changes to the default installation of content - you either have to refer to Dan Stine's AEC Bytes article to find this, or dig deep in the Autodesk help file to find notes on the significant change to content installation.

  • What this means is that all the normal content that was previously installed with Revit is no longer done automatically.
  • Now it only installs the core content that is required to run Revit - templates and sample files.
  • Additional content can be added to the install process, but only for select countries:
    • US Base Families
    • UK Base Families
    • German Base Families
  • Additional content can also be installed later - using the 'Get Autodesk Content' command on the 'Insert' menu.


Install Settings

After choosing British English as the language (and it knows my location as Australia), you might expect the installer to know what content you might be interested in - but no, the default is for US Base Families.

  • NB. Make sure you don't miss the settings for Revit itself - the tiny drop-down arrow below the checkbox for Autodesk Revit 2021 - I did forget it this year, despite writing it up previously.
    • This should allow you to uncheck the MEP Fabrication options - assuming that you don't want them.

  • After changing the additional content from US to UK Base Families, the required space drops from 8.05Gb to 7.05Gb.  That makes you wonder what the rest of the world is missing out on relative to the extra 1Gb in the US supplied base families.

  • By default the Medium and Advanced materials libraries check-boxes are ticked.

  • The installer automatically picks up your country from the computer settings.

  • Once you start installing you get the usual pretty pictures that have less relevance to Revit with each passing year.

  • On completion, Revit tells you what it installed

  • This includes the things that you did not want it to install:

  • The next step is to remove those items that you don't want
    • A few years back Autodesk Desktop App was not working properly, so I always remove it - not sure if it works consistently now, but I always want to install updates in my own time, not as soon as they are released.  Remember the Revit 2020.2 "Internal Origin Debacle"!
    • As a BIM Manager you will want to control if and when point releases are installed - so you absolutely do not want users to click on yes to upgrades when they get prompted.

  • Having accidentally installed MEP Fabrication Imperial and Metric they do show up in the Programs list as separate elements, although only listed as 'content', with no mention of Fabrication - however, this may not be such a big deal as the files are small, so I only removed the Imperial content.

Space Junk

After installation there will be a huge amount of Autodesk "space junk" on your hard disk.  Most of this can be removed but this will be entirely at your own risk - it is advisable to make sure you have backups somewhere in case the files turn out to be required.

The install consumed over twice the 7.05Gb that it told me was required.


Here are some of the files that I found, which looked superfluous to me:

Steel Connections

  • Multiple Country folders

  • Removing all the except the country I chose saved 700 Mb

Templates

  • All those country templates cause 1.45Gb of bloat

  • The various discipline project templates may or may not be required depending on your company

  • Family templates are also bloated with countries other than those required

  • A quick tidy up removes 130 Mb of family templates


  • Install temp files were not automatically removed - all 2.7 Gb of them
  • There are also 110+ Mb of install log files, but I would not recommend removing those

Sample Files

  • Do we really need all these sample files to be installed in the Program Files directory?  All 571 Mb of them?  The largest 5 of them are 450 Mb worth of stuff I have never used - and those exist in each version of Revit that you have installed.
  • NB. I would recommend leaving at least the basic ones for your chosen discipline(s).

Country Code

This starts getting risky as you might accidentally delete something vital, but in the Program Files Revit 2021 folder there are another 420Mb of country-specific folders full of dlls


There is probably more space junk in there that you could remove, but it all takes time so I think I've reached the law of diminishing returns point - until the next time I want to install some Autodesk software!  Then I will need vast amounts of spare disk space again.

I don't think the writers of the installation software have any conception of the real world out there - they don't understand that taking the easy option for them is really annoying for end-users and BIM Managers.  It also wastes a huge amount of time for those of us who don't have endless disk capacity and actually want to minimise the amount of junk on our computers.

Next time - some of the interesting new features of Revit 2021 . . .  . .


Tuesday 16 June 2020

Callout Reference Label in Revit


Following on from my previous post on Real Callouts vs Reference Other View Callouts, there is one issue that I did not address previously:

Managing the Callout Reference Label in Revit is a total pain as well as being counter-intuitive:


Revit likes to add the reference label to your callouts - typically it reads "Sim" for Similar (in the Australian Revit template - not sure about other countries).
  • Revit Automatically shows the label when you use 'Reference Other View' but not on Real Callouts
Unfortunately it is not possible to control the visibility (or wording) of this label on an instance basis:
  • The reference label is a Type property of the view
  • What this means is that if you use my proposed method of making all Callouts by 'Reference Other View', you will always get the "Sim" label - even if you only have one instance of the callout.
  • You can simply remove the reference from the type property of the view - but then you would never get the reference label at all, in any situation.
  • The problem here is that the 'Reference Label' property belongs to the original view that you are referring to - if you change the property it affects all views of that type (not just the selected callout).
    • in my opinion it should belong to the actual callout, so that you could decide whether you want it or not on particular callouts.
  • In that scenario it could still be a type property - of the callout (not the view).
I actually don't like to use this property at all - I can't see the point of it in a documentation set:
  • If a referenced detail is "Similar" that means it is not actually the same - it is a slightly different detail, so it really ought to have its own view and reference.
  • If you have multiple instances of a callout, all pointing to exactly the same detail - then the are "The Same" not "similar", in which case the reference is redundant.
  • However, there are many documentation managers who do like to use this "Sim" convention on their drawing sets - so we have to find a workaround for them.
If you use 'Reference Other View' for all callouts, then you have to make the Reference Label property blank for all view types.

Workarounds?

My workaround is to just not use the "Sim" notation at all - but for those that are forced to use it . . . .

I have tried to find a way to add a symbol or text to the callout, but that is fraught with problems too:
  • If you add a line to the callout symbol it shifts the whole callout bubble
  • If you disable the system "Sim" reference, and add your own text label, it is not possible to link to the callout in any way:
    • Cannot snap to the callout symbol
    • Cannot snap to the callout lines
    • Cannot Group the callout and symbol (or text, or detail component) - it won't include the callout as it is a view.

Does anyone have a good idea on this one?

Thursday 4 June 2020

Which Kind of Callout to Use in Revit

Previously I have written about some of the limitations and inconsistencies with Revit Callouts:
There are some strange and frustrating restrictions, which mean you need to carefully plan how to manage Callouts.

Here I am going to describe the different ways to make Callouts in Revit, and propose a method of working that is different to the way Revit was designed, and probably different to how you use them.

Which Kind of Callout to Use?

1. Real Callout


The standard ‘Callout’ command places a rectangle defining the callout view extents. This will create a new view, and place the view reference rectangle on the active view. For reasons listed below, this method is not preferred.

  • You cannot change the reference.
  • You cannot move the callout to a different parent view.
  • You cannot change the callout view family between Plan/Detail (Plans only).
  • The callout rectangle can be stretched or rotated in the parent view – this will make the same change of extents or rotation to the callout view itself, which is not always desirable.
  • You cannot have the callout extents slightly different on the parent view (to make callouts readable) - they have to match the view cropping exactly.  Refer to Callout Crop-Boundary Mismatch.
  • If you copy and paste a Callout it creates an entirely new view with a different reference.
For more information see rules for Real Callouts

2. Reference Other View


Reference Other View Callouts can be created by:
  • Create a view to be referenced by the callout – eg. duplicate another view and crop it
  • Make sure the view is cropped (unless it is a drafting view).
  • On the view to place the callout, select the ‘Callout’ command, then select ‘Reference Other View’, and select a relevant view name from the drop-down menu
This method has many advantages:
  • Callouts can be moved to another view
  • Callout references can be changed to refer to different view
  • References will update if the view/sheet number is changed
  • Callouts can be copied to another parent view
It also has a few disadvantages:
  • It is possible for the user to select the wrong view in the list - there is no automatic check for this.
  • If you want to have "Sim" showing on a callout for similar details on multiple callouts, that is a Type property of the view being referred to, not a property of the callout symbol. 
    • That means it is all or nothing - ie. all instances of the callout must have "Sim" or not. 
    • It also changes the view type so it may move in your project browser, depending on your browser organistion.
  • You have to manually create each callout view (by Duplicate or Duplicate Dependent); then crop that view - this is a small price to pay for the benefits.
    • You could probably automate this using Dynamo.

3. Intersecting Views

Section callout symbols can be created automatically by Revit in section views – this occurs when one section has its extents completely within the larger section (both crop boundaries and clipping extents).
I would not recommend trying to use this method:
  • It is very confusing for users - it is better to stick with one Callout method for consistency.
  • Such callout sections may appear/disappear as view extents change

4. Fake Callouts 

Last and very much least, is a method that you should never, never use - but I've seen it often.
Fake (or dummy) view callout references can be made out of detail components or detail lines and text. This is very bad practice:
  • These may look like genuine Callouts, so people may not check the references. 
  • References will not update if view/sheets are changed.
  • This is totally against everything that Revit is trying to do!

Workflow Opinions

The following are my recommendations for working with Callouts in Revit.  Please note that these are opinions only - it is up to you to look at all the reasons I have given, and make up your own mind about this.  I accept no blame if it does not work for you.

One: All Callouts by 'Reference Other View'

Use method 2 (Reference Other View) for every single callout in your project.

If you never use methods 1 (Real Callouts), 3 (Intersecting Views), 4 (Fake Callouts), you will ensure consistency and will avoid most of the problems related to Callouts.

Two: Do Not Use Detail Views

Avoid using the Revit view family of 'Detail Views' - these have so many limitations and quirks, it is just not worth it.  Always use Plan views or Section views.  Refer to Detail Plan Callout Views

NB. If you follow the first recommendation above, this will not be an issue because it is only possible to create new detail views by Real Callouts.

Three: No Fakes

Never, never, never, never, never, never, never, never, never, never use method  4 (Fake/dummy Callouts).  It is much quicker and safer to use 'Reference Other View' callouts.
Anyone who does this in Revit should not be using Revit at all !

Reference Label

There is one problem with using only 'Reference Other View' - refer to 'Reference Label'

Feedback

I would be very interested to hear whether anyone has different (or the same) opinions about using Callouts - feel free to comment.