I was recently asked if it is possible to just underline the Revit schedule column titles without having all the lines/boxes below. At first I thought it was not possible, so I figured out a crazy workaround. As I was checking the workflow for documenting it on this blog I discovered something I didn't know (or at least had forgotten but once knew), which made the solution quite easy. I have always found that preparing conference presentations is a great way of learning a subject thoroughly - instead of thinking that you know it all. It seems that writing a blog has the same benefit.
I decided to document the workaround here anyway because someone might learn something in the process, or be able to use it for some other purpose. If you just want to know the best solution, skip to 'The Correct Workflow'
Underline Workaround Method
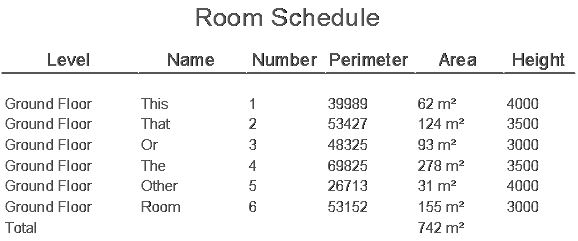
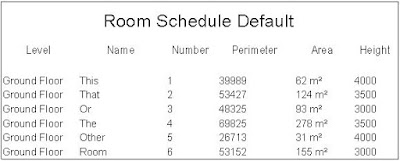
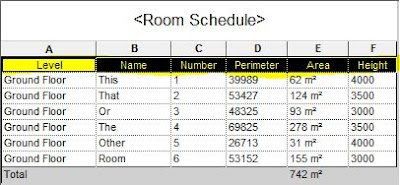
When you first place a schedule on a sheet, you get some pretty uninspiring looking graphics - all boxed in, with the heading text centre justified and the body text left justified.
 |
| Default schedule appearance |
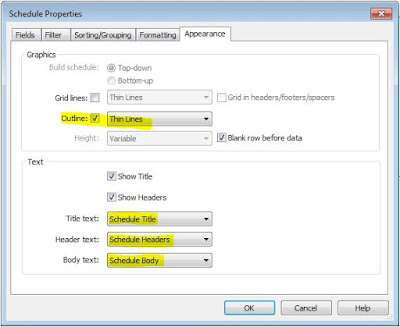
If you look at the schedule 'Appearance' properties, the default settings show Grid lines on, Outlines off. Depending on your project template, you may have the same text type for all three aspects of the schedule text - in which case it is wise to create separate text types for title, header and body text, making sure they are named clearly.
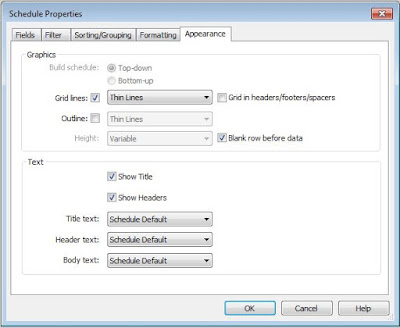 |
| Default schedule appearance settings |
You could try turning on the Outline and hiding the gridlines to see if it underlines the title/header.
 |
| Outline on, gridlines off |
Unfortunately it does not underline either the title or headers - those settings are very crude, giving us very little control at all. The end result is a box around the whole schedule.
 |
| Outline on, gridlines off |
The next thing to try is to switch off the outline box, then underline the header text itself. You could select the header text in the schedule view, and change its font properties
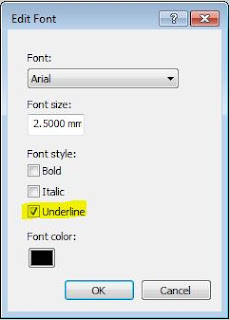 |
| Selected text font properties |
However, it is much better practise to use a specific text type for the header and edit the type properties for it - so you can change them all at once without having to select the text in the schedule cells.
 |
| Text type properties |
The end result is that individual header text words are underlined, which looks awful - we are trying to get one single line under the whole lot.
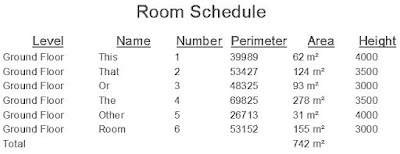 |
| Header text underlined |
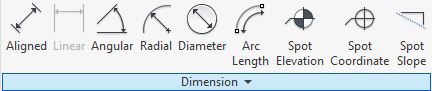
How about using the schedule formatting tools introduced in Revit 2014?
- First edit the Schedule Header text type to remove the underline.
- Then highlight all the header cells by dragging the cursor across them - this has to be done in Schedule edit mode, not in sheet view.
 |
| Select all the header text cells |
- Click on the Borders icon on the ribbon.
- This opens the Edit Borders dialog box
- Select the linestyle you want the underline to be
- Click on the border box to the lower left with cells underlined
- Click OK
- Assuming that you switched off the 'Gridlines' and 'Outline' checkboxes, you still won't see the borders on the header cells (or any borders at all).
- Enable the 'Gridlines' checkbox, and you get all the gridlines back again (not just the header underline borders.
- This was the point at which a gap in my knowledge caught me out, so I devised the crazy workaround. I thought that you could not control the borders on individual cells in the body of the schedule because the Borders icon was greyed out as soon as you select one or more cells - more on that later.
Crazy Workaround
Don't follow these steps!
- First I created a white coloured linestyle
- Then set the linestyle for 'Gridlines' to be the white linestyle
- For this to work it requires the 'Blank row before data' checkbox to be ticked
 |
| White line gridlines plus blank row before data |
- Hey presto - the gridlines are there, but you can't see them as they are white on a white screen (of course it won't work if you changed your background colour).
- The header cells should be underlined because those cells had a black border
The Correct Workflow
This is how you should do it - so much simpler:
- Set the gridlines linestyle back to something sensible like 'Thin Lines', making sure that 'Gridlines' is ticked
- What I didn't realise earlier is that you can modify the border lines on all the cells by selecting the columns at the top of the schedule, by clicking on the letters at the top - just like Excel. Duh!
- Select all the columns by running the cursor along the row of letters
 |
| Select all columns |
- Click on the Borders icon on the ribbon
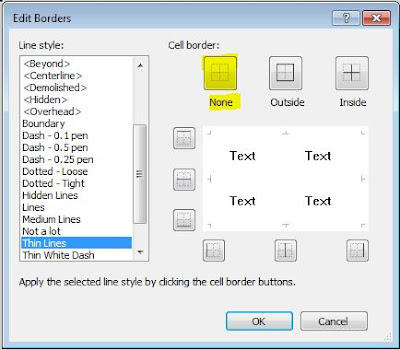 |
| None borders on all cells |
- Select the Title cell and set its cell borders to None
- Select just the header cells
|
| Select all the header text cells |
- Click on the Borders icon on the ribbon
- Select the linestyle you want the underline to be
- Click on the border box to the lower left with cells underlined
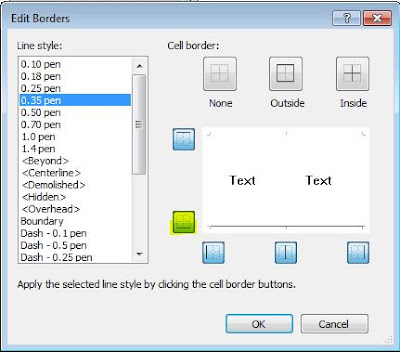 |
| Underline border |
- Make sure that 'Blank row before data' is ticked otherwise the Header cell underline borders will not show - this is the useful tip I discovered in my crazy workaround that also applies to this method
 |
| Grid in headers/footers/spacers |
- Also untick the 'Grid in headers/footers/spacers' checkbox otherwise you'll get vertical gridlines in the blank row (as above)
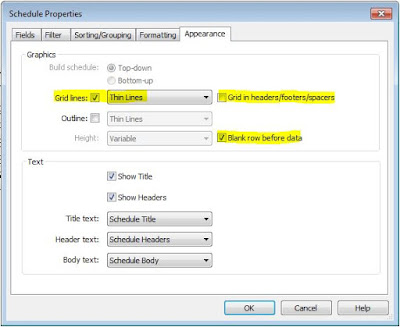 |
| Appearance formatting |
- Select each column and change its horizontal alignment as you require
 |
| Align columns |
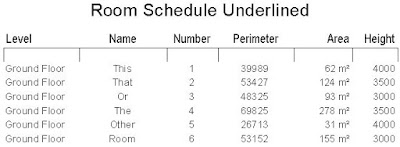
- Finally you should get the desired result
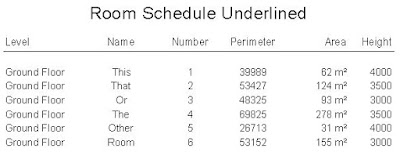 |
| Underlined headers |
- If you want to have some fun you can shade alternate columns. I don't believe there is a way to shade alternate rows, which is something people do in Excel occasionally.
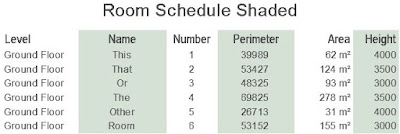 |
| Alternate columns shaded |
The moral of this tale is that we now have two different ways of controlling the gridlines on Revit schedules - they do not work well together. Basically you can opt not use the old controls unless you want very simple formatting that happens to match the old options (All gridlines or just an outline box). If you want to use the new border tools then you need to make sure the old gridline checkboxes are set to the default settings (as shown above).