
Project Unit Settings
There are 3 different icons on the 'Manage' ribbon, depending on your screen resolution and size: |
| Largest resolution or screen |
 |
| Medium resolution or screen |
 |
| Smallest resolution or screen |
Once you click on the Project Units icon it takes you to the units dialog box, which has a list of different kinds of units:
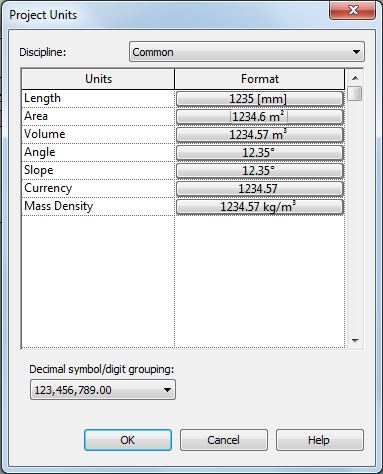
Once you choose a particular unit type, it gives the project-wide 'Format' settings for that type. Since this is the project settings, the checkbox at the top is greyed out. Some of the checkboxes are related only to imperial measurements so would always be greyed out for metric users.
This dialog box is the one common UI that appears for all methods of accessing units - but different items are greyed out in each situation that the dialog box appears.

Dimension Units
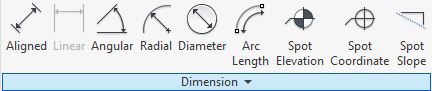
- Select a Dimension in the project
- Click on Edit Type

- Click on the Units Setting property
- This takes you to the Units Format dialog box where you can override the project settings
- Click on the Dimensions drop-down arrow
- Select the kind of dimension you want

Schedule Units Settings
- In the Schedule Properties, go to the 'Formatting' tab
- Select a field (on the left)
- Click on the 'Field Format...' button on the right

- Once you click on this, you get the standard Units dialog box
- Typically the 'Use default settings' checkbox is ticked
- You can untick it if you want to over-ride the project settings

Tag Units Settings
Refer to Revit's Most Hidden Commands (part 2) for more detail on this. It is quite tricky to find this setting:- Edit the tag family
- Select and Edit a label

- The parameter in the label may look like it is selected (on the left), but it is probably not
- Select the relevant parameter (on left, even though it shows on the right)

- The 'Properties' icon (a hand) will be enabled
- Click on it

- Finally you get to the units settings, which is normally defaulted to 'Use project settings'

- It is not possible to get to this unit override setting within the project environment (unlike dimensions and schedules)
Summary
Here we have at least 4 completely different ways to access Revit units settings:Method 1 (Ribbon in the project ):

Method 2 (Dimension Type properties in the project ):


Method 3 (Schedule formatting properties in the project ):

Method 4 (Tag properties in the Family Editor ):


Why does something so simple have to be so inconsistent, and complicated ?


