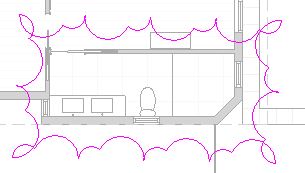
Way back in Revit 2015, Autodesk gave us a really nice enhancement:
- Ability to use all the sketch line drawing tools to quickly create Revision Clouds.
Prior to v2015 we had to laboriously draw each arc of the cloud as a segment (2 clicks: for start and end of the arc) - the longer the segment, the larger the arc radius. For those who never experienced it, that was a really tedious workflow.
I remember from Beta testing that we requested for the Rectangle to be the default drawing tool (it was not initially - I think the original default was either the line or circle. Luckily we asked for that request before the code was finished so it was quickly implemented.
One of the other little features they added was the ability to reverse the direction of the cloud using the space bar - as it was being drawn:
This allowed the user to create a reverse or inside-out cloud - it may look ugly but it has a very specific use: To indicate "Hold" on part of the drawing or model.
They Broke it in 2022
I am not sure if it happened in v2022 or 2022.1, but the spacebar trick no longer works for placing rectangular reverse clouds. Aaaargh.
It still works for circles and both polygon types.
That means you could use a 4 sided polygon to get a square cloud - but the chances of needing that shape are slim. The only other option is to use the line tool and create a rectangle by drawing the 4 sides in an anti-clockwise direction.
The good news is that it is still waaaay better than the old method pre-v2015.
Let's hope that Autodesk fix this in the next update?
Thanks to Frank Crisp of Koichi Takada Architects in Sydney for pointing this out to me.


No comments:
Post a Comment