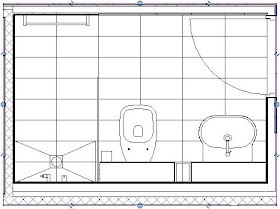
- When a callout (eg. for a bathroom) is created, you typically leave a large zone around the walls so that the callout is clearly visible on the plan
- When you go to the callout view, it has greater extents than required
- If you adjust the crop in the view to be tight around the walls, to display as you'd typically like it on the drawing sheet . . .
- it also affects the parent view callout reference - so the callout boundary is very hard to see on the drawing.
The workaround solution that I would normally recommend is to create the bathroom layout views without usng the Callout tool (duplicate views, crop manually); crop them as desired; then use Callouts with 'Reference Other View'.
- This allows you to have slightly different callout and view crop boundaries
- Be warned that it does mean that the callouts will not automatically update if the view crop boundary is changed.
More detail on this technique in a following blog post . . .


No comments:
Post a Comment