I am new to using Rhino, so my understanding of the UI and functions is pretty basic but I managed to figure out how to apply colours and materials to objects without reading any manuals. I am happy to be corrected if there are better ways to do this.
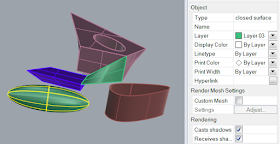
Once you have created an object (or multiple objects), you can select the object and view its properties. Unless you tell it otherwise, it will be on the 'Default' layer, with Color, Linetype etc set to 'By Layer', which means that it will behave according to the layer settings. During the new import process, Revit 2017.1 considers the default layer & colour not to be a material.
You can change the layer of the object from the Layer drop-down list, providing you have created new layers
By default, your file most likely will have no layers, so you need to create them, using the 'Edit Layer' function, available from the Edit menu.
Once the layers menu has been opened, it will be available under a Layers tab. It has typical columns showing the name, show/hide, lock, display colour (just a box) and material properties for each layer. New layers will have default settings (no colour or material defined), but these can be changed by clicking on the colour box or adjacent space under the material column.
If you are creating layers just to manage export to Revit, the names are irrelevant to Revit, but the colour and material are important - you don't need to get the colour/material right for its end use in Revit, as long as each object has a different colour, it will become a different material when imported to Revit. The materials can then be edited in Revit.
If you expand the width of the menu it shows the material name (if defined), linetype and print width/colour - the print colour does not seem to be relevant for Revit imports.
Materials
You can define a material for use in Rhino, but the only thing that Revit takes note of is the material colour. |
| Rhino Material Properties |
Object Properties
Normally, objects will display according the the 'By Layer' settings, which means that all objects on a given layer can have their properties changed together easily. |
| Object properties By Layer |
 |
| Object properties By Object |
SAT files
I tried exporting a coloured Rhino file to SAT format, then importing it to Revit, but sadly it did not bring the colours in as materials - so I am not sure what the trick is to assigning colours to objects in a SAT file. I tested various ACIS versions of SAT format, to no avail. |
| Rhino Export SAT options |
Import Colours to Revit
For details on how these colours are imported to Revit, refer to importing Rhino materials in Revit 2017.1- It seems that Revit uses the display colours set in Rhino, not the print colours.
- If you import two different Rhino files that have identical colour definitions, it treats them as different materials
- If you import the same Rhino file twice, it seems that Revit assigns the same materials to objects in both instances
- However, if you rename a material, or change its definition before importing the second instance, Revit will create new materials with a suffix of (2) added to the original name. You could use this to your advantage if you want multiple instances of the same object but with different materials.


No comments:
Post a Comment