 |
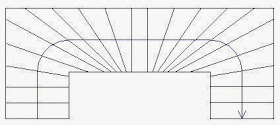
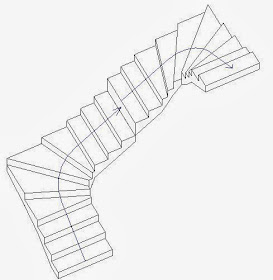
| "Single-Point" U-Shaped Winder |
Here follows a rather dodgy workaround:
2 x L-Shape = U-Shape
To create a sensible U-Shape winder stair you need to create it in two halves:- Start the stair command, and set the overall stair height to be half that you require
- Go to the L-Shape stair tool
- Place one as required
- Select the L-Shape stair and make it a Single-Point winder style
- Set the overall height back to the full stair height required
- Place another L-Shape winder component - use the space bar to rotate it to suit and snap to the end of the first one
- It will not create a landing if the two components are aligned (without a gap)
- You would expect it to automatically start the second run at the correct height
- But there will be a height mismatch
- You could try making the lower run not end with a riser and then add another riser to the run - that looks ok but when you finish the stair you get a railing height mismatch
- To solve this you need to keep the lower run ending with a riser
- Move the second run away by one tread
- Notice that the riser numbers are different - they need to be the same
- Drag the blue dot at the top of the lower run to add another riser
- Adjust the number of parallel treads on each run (if you can!)
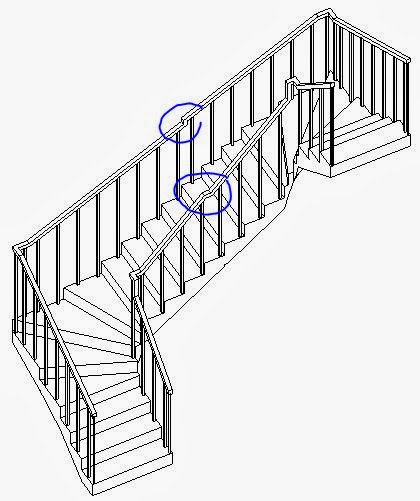
- When you complete the stair, the railings should now join each other at the same height; but the balusters will not align to each other without adjusting them - if you can understand the baluster settings in the railing type properties !
- Note also that the railing heights are not consistent - they are not even close to being the right angle to the run of parallel treads between the winders, nor the right height above them.
That is about as good as you can get with the railings, but at least the stair itself has the correct heights - assuming that your building code allows 3 winders on each corner.
If you try to put a one-tread-width gap between the two runs, and then join them with a landing, it might look almost ok . . . . .
Until you complete the stair and look at the railings, which attempt to put in horizontal or vertical sections for the landing
These railings are going to need some serious fixing up!!! I'll leave you to figure out whether it is possible or even worth attempting it.
And if you want stringers on the stair you get a whole new headache.
So my recommendation is to use this workaround to get the plan working, but if you need a true 3D representation it isn't going to work well enough in most cases.


or you could draw a boundary and do risers.
ReplyDelete